Mastering Surface Prep: The Key to Flawless Vehicle Wraps

red, drop, splash, impact, ripples, nature, water, ripple effect, waves, macro, drip, liquid, surface tension, surface, water surface, droplet

Mastering Surface Prep: The Key to Flawless Vehicle Wraps

When it comes to vehicle wraps, the secret to achieving a stunning and durable finish lies in the surface prep for wrapping. Proper preparation of your vehicle’s surface not only ensures a smooth application but also enhances the longevity of the wrap. In this guide, we’ll explore essential tips and techniques that will help you master surface prep, ensuring your vehicle wrap stands out on the road.

Why Surface Prep Matters

Surface prep is a crucial step in the wrapping process because it directly affects the adhesion of the vinyl material to the vehicle. Any dirt, grease, or imperfections on the surface can lead to bubbles, peeling, or premature wear of the wrap. A well-prepared surface creates a stable foundation for the vinyl, ensuring that the wrap adheres properly and lasts longer.

Essential Steps for Effective Surface Prep

  1. Wash the Vehicle:

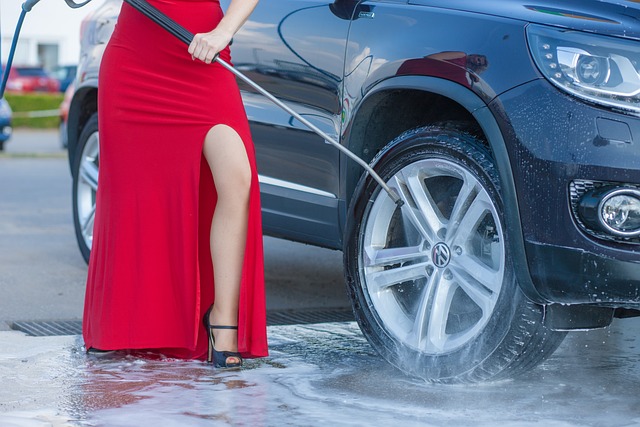
    Start with a thorough wash using a pH-balanced automotive soap. This removes dirt, grime, and contaminants that could interfere with adhesion. Be sure to rinse the vehicle well to eliminate any soap residue.

  2. Dry the Surface:

    After washing, dry the vehicle completely using a microfiber towel. Water spots can impede the adhesion of the wrap, so ensure the surface is perfectly dry.

  3. Inspect for Damage:

    Check the vehicle for any imperfections such as scratches, dents, or rust. These issues should be addressed before applying the wrap, as they can affect both the appearance and adhesion of the vinyl.

  4. Use Isopropyl Alcohol:

    Wipe down the entire surface with isopropyl alcohol (at least 70% concentration) using a clean microfiber cloth. This step removes any remaining oils and residues, creating an optimal surface for the wrap.

  5. Mask Off Areas:

    Mask off any areas that will not be wrapped, such as windows, lights, and trim. This helps to keep the focus on the areas being wrapped and prevents the wrap from accidentally adhering to unwanted surfaces.

  6. Pre-heat the Surface:

    If you’re working in a cold environment, consider using a heat gun or heat lamp to warm the vehicle’s surface slightly. Warm surfaces allow the vinyl to adhere better and conform to curves more easily.

Additional Tips for Surface Prep

  • Choose the Right Environment: Ideally, perform surface prep in a clean, dust-free environment. Avoid windy or humid conditions.
  • Work in Sections: If the vehicle has complex curves or numerous panels, consider prepping and wrapping one section at a time to maintain focus and detail.
  • Use Quality Tools: Invest in high-quality tools, such as squeegees, blade knives, and heat guns, to ensure a professional finish.

Common Mistakes to Avoid

  • Skipping the Cleaning Process: Never underestimate the importance of a clean surface. Skipping this step can lead to significant issues later.
  • Ignoring Minor Imperfections: Small scratches or chips can result in noticeable flaws in the finished wrap. Make sure to fix these before proceeding.
  • Applying Vinyl on a Wet Surface: Ensure that the surface is completely dry before applying vinyl, as moisture can lead to adhesion problems.

Conclusion

Mastering surface prep for wrapping is essential for achieving a flawless vehicle wrap that not only looks great but also lasts. By following these tips and techniques, you can ensure that your wrap adheres properly and stands the test of time. Remember, a little extra effort in the prep stage can make a significant difference in the final result, giving your vehicle a professional and polished appearance on the road.

Mastering the Art of Panel Wrapping: Top Tips for a Flawless Finish

solar panel, installation, worker, solar energy, man, installer, installing, panel, power, electricity, renewable, rooftop, male, generator, photovoltaic, cell, grid, electric, solar panel, solar panel, solar panel, solar panel, solar panel

Mastering the Art of Panel Wrapping: Top Tips for a Flawless Finish

Panel wrapping is an art that combines technique, precision, and a keen eye for detail. Whether you’re a DIY enthusiast looking to spruce up your space or a professional installer aiming to enhance your skills, mastering the art of panel wrapping can yield stunning results. In this guide, we’ll explore essential techniques and panel wrapping tips to ensure a flawless finish that stands the test of time.

Understanding the Basics of Panel Wrapping

Before diving into the techniques, it’s crucial to understand what panel wrapping is. Essentially, it involves applying a vinyl film or adhesive material to a panel’s surface to achieve a desired aesthetic or protective finish. This process is commonly used in automotive, furniture, and interior design.

Essential Tools for Panel Wrapping

To achieve the best results in your panel wrapping project, having the right tools is essential. Here’s a list of the necessary tools:

  • Heat Gun: Useful for stretching and conforming the vinyl to curves and edges.
  • Utility Knife: For precise cutting of the vinyl material.
  • Squeegee: Essential for applying the vinyl smoothly and removing air bubbles.
  • Measuring Tape: To ensure accurate measurements before cutting materials.
  • Cleaning Supplies: Including isopropyl alcohol and microfiber cloths to prep the surface.

Step-by-Step Guide to Panel Wrapping

1. Prepare Your Surface

Before applying any vinyl, ensure the surface is clean, dry, and free from dust and grease. Use isopropyl alcohol and a microfiber cloth to wipe down the area thoroughly.

2. Measure and Cut the Vinyl

Measure the panel accurately and cut the vinyl, leaving a little excess around the edges to allow for adjustments. Remember, you can always trim more, but you can’t add back once it’s been cut.

3. Apply the Vinyl

Start by peeling back a small section of the vinyl backing. Align it carefully with the panel, and slowly press it down using a squeegee to avoid air bubbles. Work from the center outwards for the best results.

4. Use Heat for Curved Areas

For edges and curves, use a heat gun to warm the vinyl, making it more pliable. This will allow you to stretch it and conform to the shape of the panel without causing damage.

5. Trim the Excess

Once the vinyl is applied, carefully trim the excess with a utility knife. Be cautious not to cut into the panel surface underneath.

6. Finishing Touches

After trimming, go over the edges with the heat gun again to ensure a strong bond. Finally, check for any air bubbles and use the squeegee to push them out towards the edges.

Common Mistakes to Avoid

Even seasoned installers can make mistakes. Here are some common pitfalls and how to avoid them:

  • Not Cleaning the Surface Properly: Ensure no dust or oil is present to avoid adhesion issues.
  • Using the Wrong Temperature: Too much heat can damage the vinyl, while too little can prevent it from conforming properly.
  • Rushing the Application: Take your time to avoid mistakes; rushing can lead to bubbles and misalignment.

Maintenance Tips for Longevity

Once your panels are wrapped, maintaining their appearance is crucial. Here are some maintenance tips:

  • Avoid Harsh Chemicals: Clean the surface with mild soap and water instead.
  • Regular Inspections: Check for any lifting edges or bubbles and address them promptly.
  • Keep It Dry: Ensure the wrapped panels do not stay wet for long periods to avoid moisture damage.

Conclusion

Panel wrapping can transform the look of any surface while providing a layer of protection. By following these panel wrapping tips, you can achieve a professional-looking finish whether you’re working on a small DIY project or a larger professional installation. With practice and attention to detail, you’ll be mastering the art of panel wrapping in no time!

Mastering the Art of Panel Wrapping: Essential Tips for a Flawless Finish

gift, packaging, cord, christmas gift, wrapped up, christmas, wrapping paper, wrap up, gift wrapping

Mastering the Art of Panel Wrapping: Essential Tips for a Flawless Finish

Panel wrapping is an art that combines precision, technique, and creativity. Whether you’re looking to wrap a vehicle, furniture, or any flat surface, mastering this skill can lead to professional-grade results. In this guide, we’ll explore essential panel wrapping tips to help you achieve a smooth application and ensure long-lasting durability for any project.

Understanding the Basics of Panel Wrapping

Before diving into the techniques, it’s crucial to understand the materials and tools you’ll need for a successful panel wrapping project:

  • Vinyl Wrap: Choose high-quality vinyl that suits your project. Look for cast vinyl for vehicles, as it’s more flexible and durable.
  • Application Tools: Essential tools include a squeegee, utility knife, heat gun, and a soft cloth.
  • Surface Preparation: Clean the surface thoroughly to remove dust, grease, or any contaminants.

Essential Panel Wrapping Tips for a Flawless Finish

1. Prepare Your Workspace

Creating a suitable workspace is vital. Ensure you have ample lighting and a clean, flat surface to work on. A clutter-free environment will help you focus and reduce the risk of errors.

2. Measure and Cut Accurately

Accurate measurements are key to avoiding waste. Measure the panel you intend to wrap and add a few extra inches to your vinyl for an allowance. Use a sharp utility knife for clean cuts to ensure precision.

3. Use Heat to Your Advantage

Applying heat to the vinyl can make it more pliable and easier to stretch. Use a heat gun to warm the vinyl slightly before application, especially around curves or edges. However, be cautious not to overheat, as this can damage the vinyl.

4. Start from One Edge

Begin the application from one edge of the panel. Peel back a small portion of the backing and align the vinyl with the panel. This method allows you to control the placement better and reduces the chances of air bubbles forming.

5. Work in Sections

Instead of trying to apply the vinyl all at once, work in smaller sections. Use the squeegee to press the vinyl onto the surface, moving from the center outward. This technique helps to push out air bubbles and ensures a smooth application.

6. Keep an Eye on Air Bubbles

Air bubbles are a common issue in panel wrapping. If you notice any, use a pin to prick them and gently push out the air with your squeegee. For larger bubbles, consider using the heat gun to soften the vinyl before pushing the air out.

7. Trim Excess Vinyl Carefully

Once the vinyl is applied, it’s time to trim the excess. Use a sharp utility knife along the edges of the panel for a clean cut. Take your time with this step to avoid cutting too deep and damaging the panel underneath.

8. Finish with a Seal

To enhance durability, consider applying a sealant or protective coat over the wrapped surface. This step will help protect against UV damage, scratches, and peeling. Always follow the manufacturer’s instructions for the best results.

Common Mistakes to Avoid

Even experienced wrappers can make mistakes. Here are some common pitfalls to watch out for:

  • Skipping Surface Prep: Never underestimate the importance of a clean surface. Proper cleaning prevents adhesive failure.
  • Applying Vinyl in Cold Conditions: Cold temperatures can make vinyl stiff and harder to work with. Aim for a temperature between 60°F and 80°F for optimal results.
  • Rushing the Process: Take your time to ensure each step is done correctly. Haste can lead to mistakes that are hard to correct.

Conclusion

Mastering panel wrapping takes practice, but with the right techniques and careful attention to detail, anyone can achieve a professional finish. By following these essential panel wrapping tips, you can ensure a smooth application and long-lasting durability for any project. Remember, patience is key, and each project is an opportunity to refine your skills. Happy wrapping!

Mastering the Heat Gun: Elevate Your Wrapping Skills with Precision Techniques

match, arrival, track, finish line, competition, sport, stadium, athletics, finish line, finish line, finish line, finish line, finish line

Mastering the Heat Gun: Elevate Your Wrapping Skills with Precision Techniques

When it comes to wrapping vehicles, furniture, or other items, achieving a professional finish requires the right tools and techniques. One of the most essential tools in this process is the heat gun. This versatile device not only helps in shaping and smoothing the wrap but also enhances its durability. In this guide, we will explore effective heat gun wrapping techniques that will help you achieve stunning results.

Understanding the Heat Gun

A heat gun is an electric device that blows hot air, typically ranging from 100°F to over 1,000°F, making it perfect for various applications, including wrapping. Before diving into the techniques, it’s important to familiarize yourself with the basic components of a heat gun:

  • Temperature Control: Allows you to adjust the heat output according to the material you are working with.
  • Airflow Settings: Provides options for different airflow levels, giving you control over how concentrated the heat is.
  • Nozzle Attachments: Different nozzles can be used to direct the heat in specific ways, improving precision.

Essential Techniques for Effective Wrapping

1. Preparing Your Surface

Before applying any wrap, it is crucial to prepare the surface. Here are some steps to ensure optimal adhesion:

  • Clean the surface thoroughly to remove dirt, grease, and other contaminants.
  • Ensure the surface is dry and smooth to prevent any imperfections in the wrap.
  • If necessary, sand down any rough spots to create an even surface for wrapping.

2. Choosing the Right Temperature

Choosing the correct temperature setting on your heat gun is vital for achieving the best results. Here’s how to determine the right temperature:

  • For vinyl wraps, a temperature between 200°F and 300°F is generally ideal.
  • Test the wrap material on a small area first to ensure it can withstand the heat without damage.
  • Adjust the temperature based on the specific type of vinyl or material you are using.

3. Mastering the Heat Application

The way you apply heat can make a significant difference in the quality of your wrap. Follow these tips for effective heat application:

  • Keep Moving: Always keep the heat gun moving to avoid overheating any one spot, which can cause bubbling or melting.
  • Maintain Distance: Hold the heat gun approximately 6 to 12 inches away from the surface to prevent excessive heat concentration.
  • Use the Right Nozzle: For larger areas, use a wide nozzle to distribute heat evenly; for detailed work, a concentrated nozzle is ideal.

4. Stretching and Smoothing the Wrap

Once the wrap is applied, you may need to stretch and smooth it to eliminate wrinkles:

  • Gently heat the vinyl to make it more pliable, allowing it to conform to curves and contours without tearing.
  • Use a squeegee to press down the wrap as you heat it, ensuring a tight fit.
  • Work in sections, applying heat to one area before moving on to the next.

5. Sealing the Edges

To ensure a long-lasting finish, sealing the edges of the wrap is essential:

  • Apply heat to the edges of the wrap to activate the adhesive and help it bond securely to the surface.
  • Press the edges down firmly with the squeegee to prevent lifting.
  • Consider using a heat-resistant tape for added security, especially in high-wear areas.

Common Mistakes to Avoid

Even seasoned professionals can make mistakes when using a heat gun. Here are some common pitfalls to watch out for:

  • Overheating: Excessive heat can damage the wrap and the underlying surface, leading to peeling and bubbling.
  • Inconsistency: Uneven heat application can lead to noticeable imperfections in the final finish.
  • Ignoring the Material: Different materials require different heat settings; always check manufacturer guidelines.

Conclusion

Mastering the heat gun wrapping technique can dramatically improve the quality of your wraps, whether you’re working on vehicles, furniture, or other items. By preparing your surface, choosing the right temperature, and applying heat with precision, you can achieve a professional-grade finish that enhances both the look and durability of your projects. With practice and attention to detail, you’ll elevate your wrapping skills and achieve stunning results!

Master the Art of DIY Car Wrapping: Tips and Tricks for a Flawless Finish

bubble wrap, bubble, wrap, transparent, packaging, material, protection, air, insulation, package, protect, delivery, parcel, textured, wrapping, bubblewrap, soft, fragile, packing, cushion, plastic, gray bubbles, bubble wrap, bubble wrap, bubble wrap, bubble wrap, bubble wrap, bubblewrap, bubblewrap

Master the Art of DIY Car Wrapping

Wrapping your car can be a fun and rewarding project that transforms your vehicle’s appearance. However, achieving a professional look requires some knowledge and skill. In this guide, we’ll share essential DIY car wrapping tips to help you wrap your car like a pro.

Choosing the Right Materials

The first step in achieving a flawless finish is selecting the right materials. Here are some key factors to consider:

  • Vinyl Wrap: Opt for high-quality cast vinyl, which is more durable and easier to work with than calendared vinyl. Brands like 3M, Avery Dennison, and Oracal offer excellent options.
  • Application Tools: Invest in a squeegee, utility knife, heat gun, and a measuring tape. These tools are essential for a smooth application and precise cuts.
  • Surface Cleaner: Use a surface cleaner or rubbing alcohol to remove any dirt, wax, or grease from your car’s surface before wrapping.

Preparing Your Vehicle

Preparation is key to a successful wrap job. Follow these steps to ensure your vehicle is ready:

  • Wash Your Car: Start by thoroughly washing your car to remove any contaminants. Pay extra attention to the areas that will be wrapped.
  • Dry Completely: After washing, dry your vehicle completely to prevent water from getting trapped under the wrap.
  • Remove Obstructions: Take off any trim, badges, or parts that can be removed easily to ensure a seamless application.
  • Inspect for Damage: Check for scratches or dents that may affect the wrap’s appearance. Repair any damage before proceeding.

Applying the Wrap Smoothly

Now that your vehicle is prepped and you have the right materials, it’s time to apply the wrap. Here are some tips for a smooth application:

  • Work in Sections: Start with one section at a time. This helps you focus and reduces the risk of errors.
  • Use Heat: Apply heat with a heat gun to make the vinyl more pliable, especially around curves and edges. Be careful not to overheat, as this can damage the vinyl.
  • Stretch Carefully: When applying the wrap, stretch it gently to avoid bubbles and wrinkles. Use the squeegee to push out air as you go.
  • Trim Excess Vinyl: Once you’ve applied the wrap, use a utility knife to trim any excess vinyl carefully. Always cut away from the car’s surface to avoid scratches.
  • Seal the Edges: Use heat to seal the edges of the wrap for a more durable finish and to prevent peeling.

Post-Application Care

After you’ve completed your wrap, proper care is essential for maintaining its appearance:

  • Avoid Washing: Refrain from washing your car for at least 48 hours to allow the wrap to adhere fully.
  • Hand Wash Only: When washing your wrapped car, opt for a hand wash with gentle soap. Avoid automatic car washes, as they can damage the wrap.
  • Use a Protectant: Consider applying a vinyl protectant to enhance the wrap’s longevity and shine.

Common Mistakes to Avoid

To achieve a professional look, avoid these common mistakes:

  • Skipping Preparation: Never underestimate the importance of prepping your vehicle. A clean surface is vital for a successful wrap.
  • Using Low-Quality Vinyl: Cheap vinyl can lead to premature fading and peeling. Always choose high-quality materials.
  • Rushing the Process: Take your time during application. Rushing can lead to mistakes and a less-than-perfect finish.

Final Thoughts

DIY car wrapping is an art that requires practice and patience. By following these DIY car wrapping tips and taking your time with the process, you can achieve a stunning and professional-looking finish for your vehicle. Whether you want to change your car’s color, add graphics, or protect the original paint, a well-executed wrap can transform your ride. Happy wrapping!

Mastering the Art of Seamless Vinyl Wrap: Expert Techniques Revealed

go-kart, racing, drive, sport, finish, flag, carting, green sports, finish, finish, finish, finish, finish, carting

Mastering the Art of Seamless Vinyl Wrap: Expert Techniques Revealed

Vinyl wrapping has evolved into a popular method for enhancing the aesthetics of vehicles. With the right techniques, you can achieve a flawless and seamless finish that not only looks stunning but also adds durability. In this post, we’ll explore the latest seamless vinyl wrap methods used by professionals to elevate your vinyl wrapping game.

The Importance of Seamless Vinyl Wrap

A seamless vinyl wrap is crucial for several reasons:

  • Aesthetics: A seamless finish provides a clean and polished look that enhances the vehicle’s overall appearance.
  • Durability: Properly applied vinyl wraps are more resistant to wear and tear, ensuring longevity.
  • Value: A quality wrap can increase the resale value of a vehicle by protecting the original paint underneath.

Essential Tools and Materials

Before diving into the techniques, it’s important to gather the right tools and materials. Here’s a list of essentials:

  • High-quality vinyl wrap
  • Heat gun
  • Application squeegee
  • Utility knife
  • Surface cleaner
  • Measuring tape
  • Masking tape

Techniques for a Flawless Vinyl Wrap

1. Surface Preparation

Proper surface preparation is the foundation of a successful wrap. Follow these steps:

  • Clean the surface thoroughly with a surface cleaner to remove dirt, oil, and wax.
  • Inspect for imperfections such as scratches or dents, and repair them before applying the vinyl.
  • Use masking tape to outline areas that will not be wrapped, ensuring clean edges.

2. Measuring and Cutting

Accurate measuring and cutting are crucial for seamless application:

  • Measure the area to be wrapped carefully, allowing for extra material at the edges.
  • Lay the vinyl flat and cut it to size, ensuring that you have enough overlap for seams.
  • Use a utility knife to create clean edges and avoid jagged cuts.

3. Heating the Vinyl

One of the most important steps to achieve a seamless finish is heating the vinyl:

  • Use a heat gun to warm the vinyl slightly before application. This makes it more pliable and easier to work with.
  • Be cautious not to overheat, as this can cause damage or distortion in the vinyl.

4. Application Techniques

Applying the vinyl correctly is essential for a seamless finish:

  • Start from one side and gradually work your way across, using the application squeegee to smooth out air bubbles.
  • Apply pressure evenly and continuously, ensuring that the vinyl adheres well to the surface.
  • Use your heat gun as needed during application to help conform the vinyl to curves and contours.

5. Trimming and Finishing

Once the vinyl is applied, it’s time to trim and finish:

  • Carefully trim excess vinyl along edges with a utility knife, ensuring a clean line.
  • Use the heat gun again to shrink and seal the edges of the wrap, preventing peeling.
  • Inspect the wrap for any imperfections and address them immediately for a perfect finish.

Common Mistakes to Avoid

Even seasoned professionals can encounter issues. Here are common mistakes to watch out for:

  • Skipping surface preparation can lead to poor adhesion.
  • Not allowing enough overlap can cause seams to become visible.
  • Overheating the vinyl can result in distortion and loss of color.

Conclusion

Mastering the art of seamless vinyl wrap requires practice, patience, and the right techniques. By utilizing the expert methods outlined above, you can achieve a flawless finish that enhances the aesthetics and durability of your vehicle. Remember, the key to a successful wrap lies in preparation, application, and finishing touches. Happy wrapping!

Master the Art of Knife-Less Tape Wrap: A Safe and Efficient Alternative for Vehicle Graphics

kitchen, cooking, knife, cilantro, mixing bowl, strainer bowl, strainer, kitchenware, parmesan, shredded cheese, shredded parmesan, cutting board, wood cutting board, kitchen, kitchen, kitchen, kitchen, cooking, cooking, cooking, cooking, cooking, knife, cutting board

Introduction to Knife-Less Tape Wrap

Applying vehicle graphics can often seem like a daunting task, especially when it comes to cutting materials without damaging the underlying surfaces. Fortunately, the knife-less tape wrap method has revolutionized the way we approach this challenge. This innovative technique eliminates the need for traditional cutting tools, offering a safer and more efficient solution for both professional installers and DIY enthusiasts.

What is Knife-Less Tape Wrap?

The knife-less tape wrap method utilizes a special tape that has a built-in, ultra-thin line which acts as a cutting edge. This allows users to create clean, precise cuts in vinyl wraps without the risk of scratching or damaging the vehicle’s paint or other surfaces. The tape is applied to the surface, and once the vinyl is laid down, pulling the tape away creates a perfect cut, ensuring a professional finish.

Benefits of Using Knife-Less Tape Wrap

  • Safety First: With no sharp blades involved, the risk of accidental cuts or damage to the vehicle is significantly reduced.
  • Precision Cuts: The built-in cutting line ensures clean edges, providing a polished look to your graphics.
  • Time Efficiency: The method streamlines the process, allowing for quicker application and less time spent on cleanup.
  • Versatility: Ideal for a variety of projects, from full vehicle wraps to smaller decals, making it suitable for both personal and commercial use.
  • Easy to Use: The learning curve is minimal, making it accessible for beginners while still meeting the high standards of experienced professionals.

How to Use the Knife-Less Tape Wrap Method

Using the knife-less tape wrap method is straightforward. Follow these steps to achieve the best results:

  1. Gather Your Materials: You will need knife-less tape, vinyl wrap, a squeegee, and a heat gun (if necessary).
  2. Prepare the Surface: Clean the vehicle surface thoroughly to remove any dirt or debris that could interfere with adhesion.
  3. Apply the Knife-Less Tape: Position the tape where you want to make your cut. Ensure it is straight and securely adhered to the surface.
  4. Lay Down the Vinyl: Carefully apply your vinyl wrap over the tape, making sure to press it down firmly. Use a squeegee to smooth out any air bubbles.
  5. Make the Cut: Once the vinyl is in place, pull the tape away slowly. The cutting line will slice through the vinyl, creating a perfect edge.
  6. Finish Up: Trim any excess vinyl if needed and use a heat gun to ensure the edges are sealed and adhere properly.

Common Mistakes to Avoid

While the knife-less tape wrap method is user-friendly, there are a few common pitfalls to be aware of:

  • Neglecting Surface Preparation: Always ensure the surface is clean and dry before applying the tape and vinyl.
  • Incorrect Tape Placement: Take your time to position the tape accurately; misplacement can lead to uneven cuts.
  • Skipping the Squeegee: Failing to use a squeegee can result in air bubbles, compromising the adhesion of the vinyl.
  • Pulling the Tape Too Quickly: Gently pull the tape to avoid tearing the vinyl or creating jagged edges.

Conclusion

The knife-less tape wrap method is a game-changer for anyone looking to apply vehicle graphics safely and efficiently. By eliminating the risks associated with cutting tools, this method not only enhances safety but also ensures precision and professionalism in every project. Whether you are a seasoned pro or just starting, mastering this innovative technique will elevate your vehicle wrapping skills to the next level.

Ultimate Guide to Caring for Your Vinyl Wrapped Car: Tips for Longevity and Shine

automobile, to wash, clean, to clean, car maintenance, car maintenance, car maintenance, car maintenance, car maintenance, car maintenance

Ultimate Guide to Caring for Your Vinyl Wrapped Car: Tips for Longevity and Shine

Vinyl wrapping your car is an excellent way to enhance its appearance while providing a layer of protection for the original paint. However, proper care for your vinyl wrapped car is essential to maintain its glossy finish and extend its lifespan. In this guide, we’ll explore essential maintenance tips, washing techniques, protective measures, and common mistakes to avoid.

Understanding Vinyl Wraps

Before diving into maintenance, it’s important to understand what vinyl wraps are. Vinyl wraps are made of a durable material designed to adhere to the surface of your car. They can change the car’s color, add graphics, or provide a protective layer. With the right care, a vinyl wrap can last anywhere from 5 to 7 years.

Washing Your Vinyl Wrapped Car

Regular washing is crucial for keeping your vinyl wrap looking its best. Here are some tips:

  • Choose the Right Soap: Use a pH-balanced car wash soap to avoid damaging the vinyl. Avoid harsh detergents or solvents.
  • Hand Wash Only: Always hand wash your vinyl-wrapped car. Automatic car washes can cause scratches and damage the wrap.
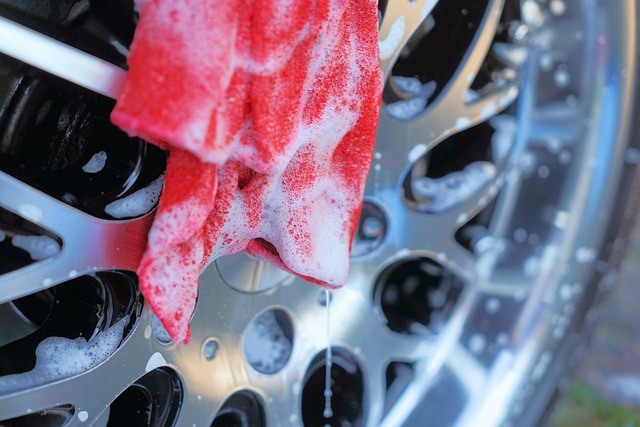
  • Use Soft Tools: Employ microfiber towels or soft sponges to gently clean the surface without causing abrasions.
  • Wash in the Shade: Avoid washing your car in direct sunlight to prevent soap from drying too quickly, which can leave residue.
  • Rinse Thoroughly: Ensure all soap is rinsed off completely to avoid any buildup that could dull the finish.

Drying Techniques

After washing, proper drying is essential to prevent water spots:

  • Use Microfiber Cloths: Use a clean, dry microfiber towel to gently blot the surface. Avoid dragging the towel across the wrap.
  • Air Dry: If possible, allow the car to air dry after blotting to minimize the risk of scratches.

Protective Measures

To keep your vinyl wrap looking new and shiny, consider the following protective measures:

  • Apply a Ceramic Coating: A ceramic coating can provide additional protection against UV rays, dirt, and contaminants.
  • Use a Sealant: Vinyl-specific sealants help to enhance shine and protect the surface from fading.
  • Avoid Harsh Chemicals: Stay away from products containing alcohol, ammonia, or strong solvents that can degrade the wrap.
  • Park in the Shade: Whenever possible, park your car in a garage or shaded area to reduce UV exposure.

Common Mistakes to Avoid

To ensure the longevity of your vinyl wrap, be aware of these common mistakes:

  • Neglecting Regular Maintenance: Skipping regular washes can lead to dirt buildup, making it harder to clean and potentially damaging the wrap.
  • Using the Wrong Products: Avoid using waxes or polishes not designed for vinyl wraps, as they can cause discoloration.
  • Ignoring Repairs: If you notice any damage, such as peeling or lifting, address it immediately to prevent further deterioration.
  • Overexposure to Heat: Avoid leaving your car in extremely hot conditions for prolonged periods, as heat can cause the wrap to warp.
  • Skipping Professional Help: For significant scratches or tears, consult a professional for repairs instead of trying to fix it yourself.

Conclusion

Caring for your vinyl wrapped car doesn’t have to be complicated. By following these maintenance tips and best practices, you can ensure that your vehicle maintains its vibrant appearance and protection for years to come. Remember, regular cleaning, protective measures, and avoiding common mistakes are the keys to achieving a long-lasting, shiny finish on your vinyl wrap.

Essential Care Tips for Your Vinyl Wrapped Car: Keep It Looking New

vacuum cleaner, vacuuming, cleaning, cleanup, carpet, carpeting, vacuum, clean, cleanliness, cleaning equipment, cleaning, cleaning, cleaning, cleaning, cleaning, carpet, carpet, clean

Essential Care Tips for Your Vinyl Wrapped Car: Keep It Looking New

Vinyl wraps offer a stunning way to personalize your vehicle while protecting its original paint. However, just like any other aspect of your car, they require proper care and maintenance to keep them looking their best. Here are some expert tips to help you care for your vinyl wrapped car and ensure it remains vibrant and glossy for years to come.

Cleaning Techniques for Vinyl Wraps

One of the most crucial aspects of maintaining your vinyl wrap is regular cleaning. Here are some effective cleaning techniques:

  • Use the Right Products: Avoid harsh chemicals that can damage the vinyl. Instead, use a pH-balanced car wash soap designed for vinyl wraps.
  • Gentle Washing: Use a soft microfiber cloth or sponge to gently wash the surface. Avoid scrubbing too hard, as this can scratch the material.
  • Rinse Thoroughly: Make sure to rinse off all soap residue with clean water to prevent any buildup that could dull the finish.
  • Dry Properly: Use a microfiber towel to dry your vinyl wrap. This will help prevent water spots and streaks.

Protective Measures

Protecting your vinyl wrap is essential for maintaining its appearance. Consider these protective measures:

  • Apply a Ceramic Coating: A ceramic coating can provide an additional layer of protection against UV rays, dirt, and other contaminants.
  • Use a Vinyl Sealant: Applying a vinyl-specific sealant can enhance the gloss and provide a protective barrier against fading.
  • Park Smart: Whenever possible, park your car in a garage or shaded area to minimize sun exposure that can lead to color fading.
  • Avoid Automatic Car Washes: The brushes and harsh chemicals used in automatic car washes can damage the vinyl. Opt for touchless washes or hand washing instead.

Common Mistakes to Avoid

While caring for your vinyl wrapped car, it’s easy to make mistakes that could compromise the wrap’s integrity. Here are some common pitfalls to avoid:

  • Neglecting Regular Maintenance: Regular cleaning and care are vital. Neglecting your vinyl wrap can lead to irreversible damage.
  • Using Wrong Tools: Avoid using abrasive sponges, brushes, or towels that can scratch or tear the vinyl.
  • Ignoring Small Issues: Address any small scratches or tears immediately. Vinyl wraps can be repaired if caught early, but larger issues may require a complete rewrap.
  • Overlooking the Edges: Pay attention to the edges of the wrap. These areas are prone to peeling if not properly cared for.

Maintaining the Interior of Your Vinyl Wrapped Car

While the exterior is important, don’t forget about the interior! Here are some tips to keep the interior looking as good as the outside:

  • Regular Vacuuming: Keep the interior clean by vacuuming regularly to remove dirt and debris.
  • Use Interior Cleaners: Use gentle, non-abrasive cleaners on vinyl surfaces to avoid damage while maintaining cleanliness.
  • Protect from Sunlight: Use sunshades to protect the interior from UV damage, which can fade and crack vinyl seats and surfaces.

Final Thoughts

Taking the time to care for your vinyl wrapped car will pay off in the long run by keeping it looking new and fresh. By implementing these cleaning techniques, protective measures, and avoiding common mistakes, you’ll ensure that your vehicle remains a head-turner for years to come. Remember, proper care for your vinyl wrapped car not only enhances its appearance but also increases its resale value. Happy driving!

Essential Tips for Maintaining Your Vinyl Wrapped Car: Keep It Fresh and Vibrant

car care, cleaning, automobile, service, rim, clean, to wash, water, vehicle, to clean, sponge, tire service, car, car wallpapers, nature, car care, car care, car care, car care, car care

Essential Tips for Maintaining Your Vinyl Wrapped Car: Keep It Fresh and Vibrant

Vinyl wraps have become a popular choice for car enthusiasts looking to customize their vehicles while protecting the original paint. However, just like any other part of your car, vinyl wraps require care for vinyl wrapped car to ensure they remain fresh and vibrant. Here are some effective strategies to maintain your vinyl wrap and keep your vehicle looking its best.

1. Regular Cleaning

Cleaning your vinyl wrapped car is essential to prevent dirt and grime buildup. Follow these cleaning techniques:

  • Use the Right Supplies: Always use a pH-neutral car wash soap and soft microfiber cloths or sponges. Avoid using abrasive materials that could scratch the surface.
  • Wash by Hand: While automatic car washes are convenient, they can be harsh on vinyl wraps. Hand washing allows for more control and reduces the risk of damage.
  • Rinse Thoroughly: After washing, ensure you rinse the car thoroughly to remove all soap residue, as this can cause discoloration over time.
  • Dry Properly: Use a soft microfiber towel to dry the surface. Avoid air drying as it may leave water spots on the wrap.

2. Protecting Your Wrap

Protective measures can significantly extend the life of your vinyl wrap:

  • Avoid Direct Sunlight: Whenever possible, park your vinyl wrapped car in the shade or a garage. Prolonged exposure to UV rays can fade the colors and damage the wrap.
  • Use Ceramic Coating: Consider applying a ceramic coating specifically designed for vinyl wraps. This will create an additional layer of protection against UV rays, dirt, and contaminants.
  • Wax with Caution: If you choose to wax your vinyl wrap, make sure to use a wax that is safe for vinyl. Avoid products with petroleum distillates as they can cause the wrap to degrade.
  • Be Mindful of Heat: Avoid placing your vinyl wrapped car in extremely high temperatures, such as during the summer months. Excessive heat can lead to bubbling and peeling.

3. Common Mistakes to Avoid

To ensure your vinyl wrap stays in top condition, be aware of these common mistakes:

  • Ignoring Maintenance: Just like any vehicle, a vinyl wrapped car requires regular maintenance. Neglecting cleaning and protective measures will lead to premature wear.
  • Using Harsh Chemicals: Avoid using ammonia-based cleaners or any harsh chemicals. These can break down the adhesive and damage the wrap.
  • Neglecting Repairs: If you notice any scratches or damages, address them immediately. Small issues can escalate quickly if left unattended.
  • Skimping on Quality: When choosing a vinyl wrap, it’s essential to invest in high-quality material. Cheaper options may save you money upfront but can lead to costly repairs down the line.

4. Seasonal Considerations

Different seasons can affect the maintenance of your vinyl wrapped car:

  • Winter: In winter, road salt and grime can accumulate on your wrap. Make sure to wash your car more frequently during this time to prevent corrosion.
  • Summer: In the hot months, consider using a UV protectant to shield your wrap from sun damage. Regular washing will also help remove any sticky substances from summertime road trips.

5. Professional Help

Sometimes, professional assistance is the best route:

  • Professional Cleaning: Schedule a professional cleaning every few months to give your wrap a deep clean that you might not be able to achieve at home.
  • Expert Inspections: Periodically have your wrap inspected by a professional to identify any potential issues before they become serious problems.

Conclusion

Maintaining a vinyl wrapped car doesn’t have to be a daunting task. By following these essential tips for the care for vinyl wrapped car, you can keep your vehicle looking fresh and vibrant for years to come. Regular cleaning, protective measures, and avoiding common mistakes will ensure your investment remains in excellent condition, allowing you to enjoy driving a customized vehicle that turns heads.