Unlocking the Art of Vinyl Wrapping: Step-by-Step Techniques for a Flawless Finish

transformation, digital, visualization, digitization, gear, work, design, laptop, finger, touch, smart, transformation, transformation, transformation, transformation, transformation

Unlocking the Art of Vinyl Wrapping: Step-by-Step Techniques for a Flawless Finish

Vinyl wrapping has taken the DIY world by storm, allowing enthusiasts to transform surfaces with a professional look without the hefty price tag. Whether you’re looking to wrap your car, furniture, or gadgets, mastering vinyl wrapping techniques can lead to stunning results. In this blog post, we will explore essential techniques, step-by-step instructions, and tips to help you achieve a flawless finish at home.

Understanding Vinyl Wrapping

Vinyl wrapping involves applying a thin layer of vinyl film over a surface. This process not only provides a new color or texture but also protects the underlying material. Here are some key benefits of vinyl wrapping:

  • Cost-Effective: Less expensive than a full paint job.
  • Versatility: Can be applied to various surfaces including vehicles, furniture, and electronic devices.
  • Easy Removal: Unlike paint, vinyl can be removed without damaging the underlying surface.

Essential Tools and Materials

Before diving into the wrapping process, gather the following tools and materials:

  • High-quality vinyl wrap
  • Heat gun or hairdryer
  • Utility knife or vinyl cutter
  • Application squeegee
  • Cleaning supplies (isopropyl alcohol, microfiber cloth)
  • Measuring tape
  • Masking tape

Step-by-Step Vinyl Wrapping Techniques

Step 1: Preparing the Surface

Preparation is crucial for a successful wrap. Follow these steps:

  1. Clean the Surface: Use isopropyl alcohol and a microfiber cloth to remove any dirt, grease, or wax.
  2. Inspect for Damage: Ensure the surface is smooth and free of scratches or dents.
  3. Measure and Cut: Measure the area to be wrapped and cut the vinyl with extra material (around 2-3 inches) for margin.

Step 2: Applying the Vinyl

Now that your surface is ready, it’s time to apply the vinyl:

  1. Position the Vinyl: Lay the vinyl over the surface, using masking tape to hold it in place temporarily.
  2. Start from One Edge: Begin to peel the backing paper off from one edge while slowly applying the vinyl to the surface.
  3. Use the Squeegee: Gently press the vinyl onto the surface with the squeegee, starting from the center and moving outward to remove air bubbles.
  4. Heat for Flexibility: Use a heat gun to warm the vinyl slightly, making it more pliable. This is especially useful for curves and edges.

Step 3: Trimming and Finishing

Once the vinyl is applied, it’s time for the finishing touches:

  1. Trim Excess Vinyl: Use a utility knife to carefully cut away the excess vinyl along the edges.
  2. Seal the Edges: Use the heat gun to seal the edges of the vinyl securely, which helps prevent peeling.
  3. Final Inspection: Check for any air bubbles or imperfections. Use the squeegee to push out any trapped air.

Tips for a Flawless Finish

To enhance your vinyl wrapping skills, consider the following tips:

  • Practice on Smaller Items: Before tackling larger surfaces, practice your technique on small items like phone cases or small furniture.
  • Work in a Controlled Environment: Avoid wrapping in extreme temperatures or windy conditions, as this can affect adhesion.
  • Use Quality Materials: Invest in high-quality vinyl wrap for better durability and finish.

Conclusion

By following these vinyl wrapping techniques, you can achieve a professional-looking finish on various surfaces at home. With practice and the right tools, vinyl wrapping can become an enjoyable and rewarding DIY project. So gather your materials, prepare your surface, and start transforming your items today!

Mastering Vinyl Wrapping Techniques: Transform Your Vehicle with Style

matte, wrap, black, car, mat, carbon, foil, sticker, style, car wallpapers, lifestyle, product, wrapping, design, auto, vehicle, window, tint

Mastering Vinyl Wrapping Techniques: Transform Your Vehicle with Style

Vinyl wrapping has surged in popularity among car enthusiasts and casual drivers alike. Whether you’re looking to change the color of your vehicle, add unique designs, or protect the original paint, mastering vinyl wrapping techniques can elevate your vehicle’s appearance significantly. In this blog post, we will explore the latest techniques, application tips, design choices, and maintenance strategies for achieving stunning results.

Understanding Vinyl Wraps

Vinyl wraps are essentially large sheets of vinyl that can be applied to the exterior of a vehicle. These wraps come in a variety of colors, finishes, and textures, allowing for endless customization options. The primary benefits of using vinyl wraps include:

  • Cost-Effectiveness: Vinyl wrapping is often more affordable than a complete paint job.
  • Reversibility: Unlike paint, wraps can be removed without damaging the original surface.
  • Protection: Wraps can protect the vehicle’s paint from scratches and UV damage.

Latest Vinyl Wrapping Techniques

To achieve a professional-looking wrap, it’s essential to stay updated on the latest vinyl wrapping techniques. Here are some key methods:

1. Surface Preparation

Before applying the vinyl, the surface must be thoroughly cleaned and prepped. Follow these steps:

  • Wash the vehicle to remove dirt and grime.
  • Use a clay bar to eliminate contaminants on the paint.
  • Wipe down the surface with isopropyl alcohol to ensure it’s clean and dry.

2. Measuring and Cutting

Accurate measurements are critical in vinyl wrapping. Here’s how to do it right:

  • Measure each panel of the vehicle to determine the amount of vinyl needed.
  • Use a utility knife or vinyl cutter to trim the vinyl, leaving extra material for overlap.

3. Application Techniques

There are several methods to apply vinyl wraps effectively:

  • Dry Application: Suitable for flat surfaces, this method uses a squeegee to push air out from underneath the vinyl.
  • Wet Application: Ideal for curves and complex shapes, this technique uses a solution to allow for repositioning the vinyl before it adheres.
  • Heat Activation: Applying heat with a heat gun helps the vinyl conform to the vehicle’s contours.

Creative Design Choices

Choosing the right design is crucial for creating a standout look. Consider these options:

  • Solid Colors: A classic choice for a sleek, modern appearance.
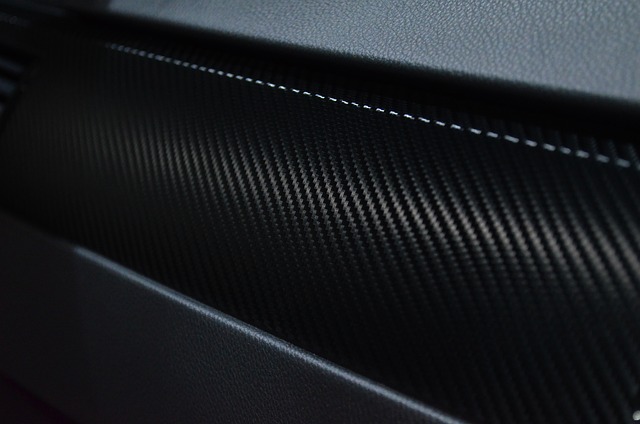
  • Textured Finishes: Options like matte, gloss, or carbon fiber can add depth and interest.
  • Custom Graphics: Work with a designer to create unique graphics that reflect your personality.

Maintenance Tips for Your Vinyl Wrap

To keep your vinyl wrap looking fresh and vibrant, proper maintenance is essential. Here are some tips:

  • Washing: Hand wash your vehicle with a mild soap and a soft sponge. Avoid automatic car washes to prevent damage.
  • Pest Control: Clean off bird droppings and tree sap promptly to avoid staining the vinyl.
  • Regular Inspections: Check for any lifting edges or bubbles and address them immediately to prevent further damage.

Conclusion

Mastering vinyl wrapping techniques can significantly transform your vehicle’s appearance while providing an added layer of protection. From understanding the materials and methods to choosing creative designs and maintaining your wrap, each step plays a crucial role in achieving a stunning result. Whether you’re a DIY enthusiast or considering professional help, the world of vinyl wrapping offers endless possibilities for personalization and style.

Mastering Vinyl Wrapping Techniques: A Comprehensive Guide for Beginners

vinyl, turntable, electronics, music, music player, phonograph, phonograph record, player, record player, vintage, retro, oldtimer, nostalgia, nostalgic, vinyl, vinyl, vinyl, electronics, music, music, music, music, music, record player, record player, record player, nostalgia

Introduction to Vinyl Wrapping Techniques

Vinyl wrapping has emerged as a popular method for transforming surfaces, whether for vehicles, furniture, or various DIY projects. Mastering vinyl wrapping techniques can elevate your skills and allow you to create stunning visual effects. This comprehensive guide will walk you through essential techniques, from surface preparation to advanced application methods.

Essential Vinyl Wrapping Techniques

1. Surface Preparation

Before applying vinyl, proper surface preparation is crucial. Here’s how to ensure the best adhesion:

  • Clean the Surface: Use a degreaser or isopropyl alcohol to remove dirt, oil, and contaminants.
  • Dry the Area: Make sure the surface is completely dry before application.
  • Sand if Necessary: For rough surfaces, lightly sand to create a smoother finish.

2. Choosing the Right Vinyl

Selecting the right type of vinyl is essential for achieving the desired look and durability. Consider the following:

  • Cast vs. Calendered Vinyl: Cast vinyl is thinner and more conformable, making it ideal for complex curves. Calendered vinyl is thicker and more suited for flat surfaces.
  • Finish Options: Decide whether you want a matte, gloss, or satin finish based on your project’s aesthetic.

3. Cutting Vinyl Accurately

Accurate cutting is vital to a successful wrap. Here are some tips:

  • Use a Sharp Blade: Always use a fresh blade to ensure clean cuts.
  • Measure Twice: Take precise measurements before cutting to avoid waste.
  • Use a Cutting Mat: Protect your surfaces and ensure the blade does not damage work tables.

4. Application Techniques

Applying vinyl correctly is the heart of mastering vinyl wrapping techniques. Here are some methods to help you:

  • Dry Application: Ideal for flat surfaces, this method involves peeling the backing and applying the vinyl directly.
  • Wet Application: Use a mixture of water and a few drops of dish soap to create a sliding surface, allowing for repositioning before the vinyl adheres.
  • Heat Application: Using a heat gun can help conform the vinyl to curves and edges, making it easier to wrap contours.

5. Post-Application Techniques

Once the vinyl is applied, it’s important to finish the process correctly:

  • Trim Excess Vinyl: Use a utility knife to carefully trim any excess vinyl for a clean edge.
  • Seal the Edges: Use a heat gun to seal the edges and prevent peeling.
  • Allow to Cure: Let the vinyl sit undisturbed for 24 hours to ensure proper adhesion.

Advanced Vinyl Wrapping Techniques

1. Layering Vinyl

For unique designs, layering different colors or finishes can create eye-catching effects. Here’s how to do it:

  • Start with a Base Layer: Apply the first layer and allow it to cure.
  • Use a Translucent Layer: Overlay with a translucent vinyl for interesting color blends.

2. Creating Patterns and Graphics

Incorporating graphics or patterns can enhance your projects. Consider these steps:

  • Design Your Graphic: Use design software to create your desired pattern.
  • Print on Vinyl: Use specialized printers to print your designs onto vinyl.
  • Careful Application: Apply graphics carefully using the same methods discussed above, ensuring no air bubbles.

3. Removing Vinyl

Sometimes, you may need to remove vinyl to replace it or repair an area. Follow these steps:

  • Heat the Vinyl: Use a heat gun to loosen the adhesive.
  • Peel Away Slowly: Carefully peel the vinyl at a 45-degree angle to avoid damaging the underlying surface.
  • Clean Residue: Use adhesive remover to eliminate any leftover adhesive.

Conclusion

Mastering vinyl wrapping techniques is a rewarding skill that opens up a world of creative possibilities. With the right preparation, materials, and techniques, you can transform surfaces and bring your artistic visions to life. Whether you’re wrapping a vehicle, furniture, or embarking on a DIY project, these techniques will guide you toward success. Happy wrapping!

Vibrant Transformations: The Trend of Vinyl-Wrapped Tuktuks

asia, rickshaw, asian, bangkok, car, delhi, india, taxi, car wallpapers, tuktuk, bangkok, car, delhi, delhi, india, india, india, india, india, taxi

Vibrant Transformations: The Trend of Vinyl-Wrapped Tuktuks

In recent years, the vinyl-wrapped tuktuk has become more than just a mode of transportation; it has evolved into a canvas for artistic expression and a symbol of local culture. As urban areas continue to embrace this unique vehicle, the trend of vinyl wrapping has surged, offering striking designs and vibrant colors that cater to both aesthetic appeal and practical benefits.

What is a Vinyl-Wrapped Tuktuk?

A vinyl-wrapped tuktuk refers to a tuktuk that has been covered with a layer of vinyl film. This process involves applying a high-quality, adhesive vinyl to the exterior of the vehicle, transforming its appearance and providing a protective layer. Unlike traditional paint jobs, vinyl wraps can be easily removed or changed, allowing for personalization without the long-term commitment.

Why Choose Vinyl Wrapping for Tuktuks?

  • Customization: With countless colors, patterns, and finishes available, vinyl wraps allow tuktuk owners to express their individuality. Whether it’s a bold graphic design or a subtle matte finish, the options are virtually limitless.
  • Protection: Vinyl wrapping not only enhances aesthetics but also protects the underlying paint from scratches, UV rays, and weather elements. This prolongs the life of the vehicle and maintains its resale value.
  • Cost-Effective: Compared to a complete paint job, vinyl wrapping is often more affordable and can be completed in a shorter time frame. This makes it a popular choice for tuktuk owners looking for a quick transformation.
  • Easy Maintenance: Vinyl wraps are easy to clean and maintain. Unlike traditional paint, which can require special care, vinyl can simply be washed with soap and water.
  • Reversibility: If you decide to change your design or return to the original look, vinyl wraps can be removed without damaging the tuktuk’s paint, offering flexibility that paint cannot.

Unique Designs and Vibrant Colors

The beauty of vinyl-wrapped tuktuks lies in the creativity they inspire. Here are some popular design trends:

  • Bold Patterns: Geometric shapes, floral prints, and abstract art are all popular choices, allowing tuktuks to stand out on busy streets.
  • Branding Opportunities: Many tuktuk owners use vinyl wraps to promote businesses, featuring logos and advertisements that are eye-catching and memorable.
  • Colorful Gradients: Smooth transitions between colors create a visually striking effect that draws attention and showcases the artistic flair of the owner.
  • Customized Illustrations: Personal illustrations or local cultural motifs can tell a story or represent a community, making each tuktuk unique.

Environmental Impact and Sustainability

As sustainability becomes an increasingly important topic, vinyl wraps offer an eco-friendly alternative to traditional paint. The process of applying a vinyl wrap generates less waste and uses fewer harmful chemicals than conventional auto painting methods. Moreover, many vinyl manufacturers are now producing films that are recyclable and made from sustainable materials, contributing to a greener future.

The Future of Vinyl-Wrapped Tuktuks

As the trend continues to grow, we can expect to see more innovative designs and applications of vinyl wrapping in the tuktuk industry. With advancements in technology, vinyl wraps are becoming more durable and easier to apply, making them accessible to a broader audience. This trend not only enhances the visual landscape of urban areas but also brings communities together through shared art and culture.

Conclusion

The rise of vinyl-wrapped tuktuks is a testament to the evolving nature of urban transport and personal expression. By combining aesthetics with practicality, these vibrant vehicles are setting new standards in customization and protection. Whether you’re a tuktuk owner looking to refresh your ride or simply an admirer of creativity on wheels, the trend of vinyl wrapping is sure to impress and inspire.