Mastering Seamless Vinyl Wrap Techniques: A Step-by-Step Guide

finish, end, completed, completion, finishing, stop, gray stop, finish, finish, finish, finish, finish, end, end

Introduction to Seamless Vinyl Wrap Techniques

Vinyl wrapping has become a popular choice for those looking to customize surfaces, from vehicles to furniture. The art of seamless vinyl wrap methods not only enhances aesthetics but also protects surfaces. In this guide, we will explore advanced techniques and tips that will help you achieve a flawless, seamless finish for any project.

Understanding Vinyl Wraps

Before diving into the techniques, it’s essential to understand what vinyl wraps are. They are thin sheets of vinyl that can adhere to various surfaces, allowing for a wide range of colors and finishes. Here’s what you need to know:

  • Types of Vinyl: There are two main types of vinyl, calendared and cast. Calendared vinyl is thicker and more affordable but less flexible, while cast vinyl is thinner, more durable, and conforms better to shapes.
  • Finish Options: Vinyl wraps come in various finishes, including matte, gloss, satin, and even textured options. Choose a finish that complements your project.

Essential Tools and Materials

Having the right tools and materials is crucial for successful vinyl wrapping. Here’s a list of what you will need:

  • High-quality vinyl wrap
  • Utility knife or vinyl cutter
  • Application squeegee
  • Heat gun or hairdryer
  • Cleaning solution and lint-free cloth
  • Measuring tape and marker
  • Masking tape

Step-by-Step Guide to Seamless Vinyl Wrapping

Step 1: Prepare the Surface

Proper surface preparation is vital for ensuring the vinyl adheres well. Follow these steps:

  • Clean the surface thoroughly using a cleaning solution to remove dirt, grease, and wax.
  • Dry the surface completely with a lint-free cloth.
  • Inspect for any imperfections or damage that could affect adhesion. Repair as necessary.

Step 2: Measure and Cut the Vinyl

Accurate measurements are key to achieving a seamless look. Here’s how to do it:

  • Measure the area to be wrapped using a measuring tape.
  • Add a few extra inches to each side for trimming.
  • Lay the vinyl flat and mark your cuts using a marker.
  • Use a utility knife or vinyl cutter to carefully cut the vinyl.

Step 3: Apply the Vinyl

Now it’s time to apply the vinyl. Follow these steps for best results:

  • Start by positioning the vinyl over the surface. Use masking tape to hold it in place temporarily.
  • Peel back a portion of the backing paper and apply the vinyl to the surface gradually.
  • Use the application squeegee to smooth out air bubbles and ensure good adhesion. Work from the center outwards.
  • As you progress, continue to peel the backing and apply the vinyl in small sections.

Step 4: Heat and Conform

Heating the vinyl is a crucial step to achieving a seamless finish, especially on curves and edges:

  • Use a heat gun or hairdryer to gently heat the vinyl as you apply it. This makes the vinyl more pliable.
  • Stretch the vinyl slightly around curves and edges for a smooth fit.
  • After applying, heat the vinyl again to ensure it conforms well to the surface.

Step 5: Trim and Finish

Once the vinyl is applied, it’s time to trim the excess:

  • Using a utility knife, carefully trim the edges of the vinyl for a clean finish.
  • Be cautious not to cut into the surface underneath.
  • After trimming, go over the edges with the application squeegee to ensure they are sealed properly.

Tips for Perfecting Your Seamless Vinyl Wrap

  • Practice on smaller surfaces before attempting larger projects to build your confidence.
  • Work in a well-lit area to see any imperfections as you apply the vinyl.
  • Take your time; rushing can lead to mistakes that may ruin your wrap.
  • Consider a second pair of hands for larger projects to help with positioning.

Conclusion

Mastering seamless vinyl wrap techniques takes practice and patience, but with the right tools and the steps outlined in this guide, you can achieve a professional-looking finish. Whether it’s for a vehicle, furniture, or any other project, these seamless vinyl wrap methods will help elevate your wrapping skills. Happy wrapping!

Revamp Your Truck: Exploring the Benefits and Creativity of Vinyl Wraps

woman, truck, vehicle, driver, fashion, headscarf, female, model, outdoors, person, young, pickup truck, drive, truck, truck, truck, truck, truck, driver, driver, drive, drive

Revamp Your Truck: Exploring the Benefits and Creativity of Vinyl Wraps

In today’s world, customization has become a significant aspect of vehicle ownership. One of the most popular methods for personalizing your truck is through truck vinyl wrap. This innovative approach not only enhances the aesthetic appeal of your vehicle but also offers a range of practical benefits. Let’s dive into the reasons why you should consider a vinyl wrap for your truck.

What is Truck Vinyl Wrap?

Truck vinyl wrap is a large sheet of vinyl that is applied to the exterior of your vehicle. Available in a variety of colors, finishes, and textures, it can transform your truck’s look without the need for a permanent paint job. The versatility of vinyl wraps makes them an attractive option for truck owners looking to stand out.

Benefits of Truck Vinyl Wrap

1. Protection for Your Vehicle

One of the primary advantages of using a truck vinyl wrap is the protection it provides:

  • Shield Against Scratches and Dents: Vinyl wraps act as a barrier between your truck’s paint and the elements, reducing the risk of scratches, chips, and minor dents.
  • UV Protection: Quality vinyl wraps can protect your truck’s paint from harmful UV rays, preventing fading and oxidation over time.
  • Easy to Remove: Unlike paint, vinyl wraps can be easily removed without damaging the underlying finish, making it a less risky option for protecting your vehicle.

2. Enhanced Aesthetic Appeal

With a vinyl wrap, the possibilities for customization are nearly endless:

  • Variety of Colors: Choose from a wide spectrum of colors to match your personal style or brand identity.
  • Unique Finishes: Options like matte, gloss, satin, or metallic finishes can give your truck a distinctive look.
  • Custom Graphics: Add logos, designs, or even full vehicle graphics to make a bold statement.

The ability to completely change the appearance of your truck allows you to express your personality or even promote a business effectively.

3. Cost-Effective Customization

When it comes to vehicle customization, cost is a significant factor. Here’s why vinyl wraps are a budget-friendly choice:

  • Lower Cost Than Repainting: A professional paint job can be expensive, while a vinyl wrap typically costs significantly less, making it a more affordable option for many truck owners.
  • Less Labor-Intensive: Vinyl wrapping requires less labor than traditional painting. The installation process is generally quicker, reducing labor costs.
  • Long-Lasting Results: With proper care, vinyl wraps can last anywhere from 5 to 7 years, providing excellent value for your investment.

Creative Possibilities with Truck Vinyl Wraps

The creative scope of vinyl wraps is vast, allowing for personalization that reflects your unique style or business identity.

1. Branding and Advertising

If you use your truck for business, a vinyl wrap can serve as a mobile billboard. Here’s how:

  • Logo Placement: Feature your company logo prominently on the sides of your truck.
  • Contact Information: Include phone numbers, websites, or social media handles to attract potential customers.
  • Promotional Graphics: Utilize eye-catching graphics that represent your products or services.

2. Personal Touches

For personal vehicles, consider the following ideas:

  • Custom Patterns: Opt for unique patterns or textures that reflect your style, such as camouflage or wood grain.
  • Seasonal Wraps: Change your truck’s look with the seasons by updating your vinyl wrap periodically.
  • Artistic Designs: Collaborate with an artist to create a one-of-a-kind design that turns your truck into a work of art.

Conclusion

Investing in a truck vinyl wrap is an excellent way to revamp your vehicle while protecting its original paint and enhancing its visual appeal. With numerous benefits, including protection, customization, and cost-effectiveness, vinyl wraps offer truck owners the opportunity to express their individuality and stand out on the road. Whether for personal flair or business branding, the creative possibilities are limitless. Transform your truck today and enjoy the benefits of this innovative vehicle enhancement!

Mastering DIY Car Wrapping: Top Tips for a Flawless Finish

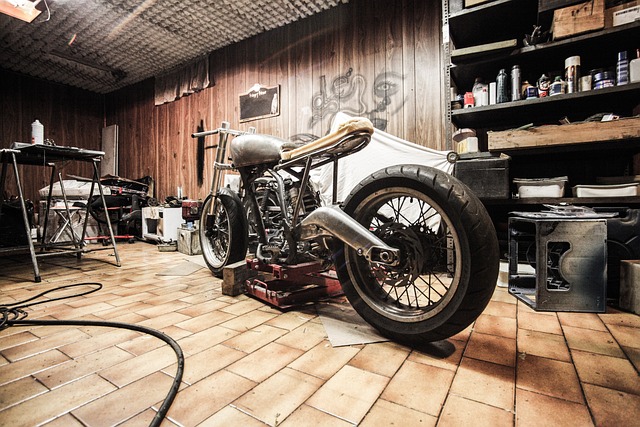
motorbike, garage, repairs, workshop, hobby, automotive, build, mechanic, motor, motorcycle, big bike, vehicle, garage, garage, garage, garage, garage, mechanic, motorcycle, motorcycle

Mastering DIY Car Wrapping: Top Tips for a Flawless Finish

Transforming your vehicle with a stunning wrap is an exciting project that can enhance its appearance and provide protection. With the right techniques and materials, you can achieve a professional-looking finish right from your garage. Here are some essential DIY car wrapping tips to help you along the way.

Step 1: Surface Preparation

Before diving into the wrapping process, it’s crucial to prepare your car’s surface properly. A clean and smooth surface ensures that the wrap adheres well and looks flawless.

Cleaning Your Vehicle

  • Wash: Start by washing your car thoroughly with soap and water to remove dirt, grease, and grime.
  • Dry: Use a microfiber cloth to dry the surface completely. This minimizes the risk of water spots.
  • Decontaminate: Use a clay bar or a similar product to eliminate any embedded contaminants that could affect adhesion.
  • Wipe Down: Finish with isopropyl alcohol to ensure the surface is free from oils and residues.

Inspecting the Surface

Check your vehicle for any imperfections such as scratches or dents. Address these issues before wrapping, as they will be magnified once the wrap is applied. Sand down rough patches and fill in any dents with body filler, then sand it smooth.

Step 2: Material Selection

Choosing the right vinyl wrap is critical for achieving the best results. Here are key factors to consider:

Types of Vinyl Wraps

  • Cast Vinyl: This type is recommended for vehicles as it conforms better to curves and contours.
  • Calendered Vinyl: More affordable but less durable; suitable for flat surfaces or temporary projects.
  • Finish Options: Decide between matte, gloss, satin, or textured finishes based on your desired look.

Quality Matters

Invest in high-quality vinyl from reputable brands. Premium materials may cost more upfront but will provide better durability and appearance.

Step 3: Tools and Techniques

Having the right tools is essential for a smooth wrapping process. Here’s a list of must-have tools:

  • Utility Knife: For trimming excess vinyl.
  • Squeegee: Helps to apply the vinyl smoothly and remove air bubbles.
  • Heat Gun: Necessary for stretching the vinyl and ensuring proper adhesion.
  • Measuring Tape: For accurate measurements of your vehicle’s surfaces.
  • Application Gloves: Prevents oils from your hands from contaminating the adhesive.

Application Techniques

To achieve a professional finish, follow these techniques:

  • Start with Large Sections: Begin wrapping larger sections of your vehicle, like the hood or roof, to build confidence.
  • Work from the Center Out: Apply the vinyl from the center of the panel outward to avoid trapping air bubbles.
  • Heat as Needed: Use a heat gun to soften the vinyl as you work around curves and edges for a snug fit.
  • Trim Carefully: Use a utility knife to trim excess vinyl, but be cautious to avoid cutting into the vehicle’s paint.

Step 4: Post-Wrapping Care

Once your car is wrapped, proper care ensures the longevity of the vinyl.

Initial Care Steps

  • Let It Cure: Allow the wrap to cure for at least 24 hours before washing or exposing it to harsh conditions.
  • Avoid Direct Sunlight: Keep the vehicle in the shade for the first few days to prevent heat damage to the adhesive.
  • Gentle Cleaning: When washing, use a soft cloth and avoid harsh chemicals to maintain the wrap’s integrity.

Maintenance Tips

Regularly check for any lifting edges or bubbles and address them promptly. A little maintenance goes a long way in keeping your wrap looking fresh.

Conclusion

With these DIY car wrapping tips, you can transform your vehicle into a stunning work of art. Remember that patience and practice are key to mastering the process. By following these steps, you’ll not only save money but also enjoy the satisfaction of a job well done. Happy wrapping!

Transform Your Vehicle: A Beginner’s Guide to Car Wrap Installation

car, audi, auto, automotive, vehicle, sports car, driving, drive, audi car, black car, luxury car, automobile, car wallpapers, speed

Transform Your Vehicle: A Beginner’s Guide to Car Wrap Installation

If you’re looking to give your vehicle a stunning new look while protecting its original paintwork, car wrap installation is an excellent choice. This guide will walk you through the essentials of car wrap installation, making it accessible for beginners. Let’s dive in!

What is Car Wrapping?

Car wrapping involves applying a large vinyl graphic or decal over the original paint of the vehicle. This process not only changes the aesthetic appeal of the vehicle but also serves as a protective layer against scratches, UV rays, and other environmental factors.

Benefits of Car Wrap Installation

  • Customizable: Choose from a wide variety of colors, finishes, and designs.
  • Protective: Protects the original paintwork from damage and fading.
  • Cost-Effective: More affordable than a full paint job and can be removed easily.
  • Temporary: Ideal for those who want to change their vehicle’s look without committing to a permanent change.

Essential Tools and Materials

Before you start your car wrap installation, gather the following tools and materials:

  • Vinyl Wrap: Choose high-quality vinyl that suits your style.
  • Application Tools: Squeegee, utility knife, and a heat gun are essential.
  • Cleaning Supplies: Isopropyl alcohol, microfiber cloths, and a spray bottle.
  • Measuring Tools: Tape measure and a ruler for precise cutting.

Preparing Your Vehicle

Proper preparation is crucial for successful car wrap installation. Follow these steps:

  1. Wash Your Car: Use soap and water to thoroughly clean the surface. Remove any dirt, grime, and wax.
  2. Dry the Surface: Ensure that the vehicle is completely dry before applying the wrap.
  3. Remove Any Obstacles: Take off handles, mirrors, and any other parts that might get in the way of the wrap.
  4. Inspect the Surface: Look for scratches or imperfections that may need to be addressed before wrapping.

Step-by-Step Car Wrap Installation

Now that your vehicle is prepped, follow these steps for the actual installation:

  1. Measure and Cut: Measure the sections of your vehicle you want to wrap and cut the vinyl accordingly, leaving a bit of excess for adjustments.
  2. Heat the Vinyl: Use a heat gun to warm the vinyl slightly, making it more pliable. This is particularly important for curved surfaces.
  3. Position the Vinyl: Place the vinyl on the desired area, ensuring it is aligned correctly before making contact.
  4. Squeegee the Vinyl: Starting from the center, use a squeegee to push out air bubbles and adhere the vinyl to the surface. Work your way outwards.
  5. Trim Excess Vinyl: Once the wrap is in place, use a utility knife to carefully trim the excess vinyl around edges and curves.
  6. Final Touches: Heat any edges to ensure they stick well and check for any air bubbles that need to be smoothed out.

Post-Installation Care

After your car wrap installation, proper care will help maintain its look:

  • Avoid Car Washes: For the first two weeks, avoid automatic car washes. Hand washes are preferable.
  • Use Mild Soap: When cleaning, use a mild soap and soft cloth to avoid damaging the wrap.
  • Park in Shade: Whenever possible, park in shaded areas to protect the wrap from prolonged sun exposure.

Conclusion

Car wrap installation is an exciting way to personalize your vehicle and protect its paintwork. With the right tools, preparation, and technique, even beginners can achieve professional-looking results. Whether you want to make a bold statement or simply refresh your vehicle’s appearance, wrapping is a fantastic option. Now, get ready to transform your ride!

Revamp Your Ride: The Ultimate Guide to Car Wrap Installation

car, vehicle, motor, transport, car wallpapers, dashboard, maserati, oldtimer, old car, cabriolet, classic, sports car

Revamp Your Ride: The Ultimate Guide to Car Wrap Installation

If you’re looking to give your vehicle a fresh look without the commitment of a new paint job, car wrap installation might be the perfect solution. Car wraps offer a range of benefits, from aesthetic upgrades to protection for your original paint. In this guide, we’ll delve into the art and science of car wrap installation, sharing expert tips to ensure a flawless finish that transforms your vehicle’s appearance.

What is Car Wrap Installation?

Car wrap installation involves applying a large vinyl graphic or decal to the exterior of a vehicle. This process not only enhances the vehicle’s look but also protects the paint underneath from UV rays, scratches, and other potential damage. Car wraps can be used for advertising, personal expression, or simply to give your car a unique flair.

Benefits of Car Wraps

  • Cost-Effective: Compared to a full paint job, car wraps are generally more affordable and can be easily removed or replaced.
  • Variety of Designs: With countless colors, textures, and finishes available, you can achieve the exact look you desire.
  • Protective Layer: Car wraps act as a shield against the elements, helping to preserve your vehicle’s original paint.
  • Quick Installation: Professional installation can often be completed in a few days, allowing you to get back on the road quickly.

Preparing for Car Wrap Installation

Preparation is key to a successful car wrap installation. Here are the steps to follow:

  1. Choose the Right Material: Vinyl wraps come in various types, including cast and calendared vinyl. Cast vinyl is more durable and better for intricate designs, while calendared vinyl is suitable for flat surfaces.
  2. Clean Your Vehicle: Thoroughly wash and dry your car to remove dirt, grease, and wax. A clean surface ensures better adhesion of the wrap.
  3. Inspect for Damage: Check for any scratches, dents, or rust that may need to be repaired before installation. Wrapping over damaged areas can lead to issues down the line.

Tools Needed for Installation

Having the right tools is essential for a successful car wrap installation. Here’s a list of what you’ll need:

Steps for Car Wrap Installation

Once you’re prepared, follow these steps for a smooth installation:

  1. Measure and Cut: Measure the areas you plan to wrap and cut the vinyl accordingly, leaving extra material for adjustments.
  2. Apply the Wrap: Start from one end of the panel and slowly lay the wrap down, using the squeegee to remove air bubbles as you go.
  3. Heat to Stretch: Use a heat gun to gently warm the vinyl, making it pliable for curves and contours. Be careful not to overheat, as this can damage the material.
  4. Trim Excess Vinyl: Once the wrap is secured, use a utility knife to trim any excess material along the edges for a clean finish.
  5. Final Inspection: Check for any bubbles or imperfections and use the heat gun to correct them if necessary.

Maintenance Tips Post-Installation

To ensure your car wrap lasts as long as possible, follow these maintenance tips:

  • Avoid Automatic Car Washes: Hand wash your vehicle with a mild soap and avoid abrasive materials.
  • Limit Exposure to Extreme Conditions: Whenever possible, park in shaded areas to protect the wrap from UV damage.
  • Regular Inspections: Check for any lifting edges or damage and address issues promptly.

Conclusion

Car wrap installation is a fantastic way to enhance the appearance of your vehicle while providing a layer of protection to the original paint. By following the steps and tips outlined in this guide, you can achieve a professional-looking wrap that reflects your personality and style. Whether you’re looking to promote your business or just want to stand out on the road, a well-executed car wrap can make all the difference.

Mastering the Art of Panel Wrapping: Essential Tips for a Flawless Finish

gift, packaging, cord, christmas gift, wrapped up, christmas, wrapping paper, wrap up, gift wrapping

Mastering the Art of Panel Wrapping: Essential Tips for a Flawless Finish

Panel wrapping is an art that combines precision, technique, and creativity. Whether you’re looking to wrap a vehicle, furniture, or any flat surface, mastering this skill can lead to professional-grade results. In this guide, we’ll explore essential panel wrapping tips to help you achieve a smooth application and ensure long-lasting durability for any project.

Understanding the Basics of Panel Wrapping

Before diving into the techniques, it’s crucial to understand the materials and tools you’ll need for a successful panel wrapping project:

  • Vinyl Wrap: Choose high-quality vinyl that suits your project. Look for cast vinyl for vehicles, as it’s more flexible and durable.
  • Application Tools: Essential tools include a squeegee, utility knife, heat gun, and a soft cloth.
  • Surface Preparation: Clean the surface thoroughly to remove dust, grease, or any contaminants.

Essential Panel Wrapping Tips for a Flawless Finish

1. Prepare Your Workspace

Creating a suitable workspace is vital. Ensure you have ample lighting and a clean, flat surface to work on. A clutter-free environment will help you focus and reduce the risk of errors.

2. Measure and Cut Accurately

Accurate measurements are key to avoiding waste. Measure the panel you intend to wrap and add a few extra inches to your vinyl for an allowance. Use a sharp utility knife for clean cuts to ensure precision.

3. Use Heat to Your Advantage

Applying heat to the vinyl can make it more pliable and easier to stretch. Use a heat gun to warm the vinyl slightly before application, especially around curves or edges. However, be cautious not to overheat, as this can damage the vinyl.

4. Start from One Edge

Begin the application from one edge of the panel. Peel back a small portion of the backing and align the vinyl with the panel. This method allows you to control the placement better and reduces the chances of air bubbles forming.

5. Work in Sections

Instead of trying to apply the vinyl all at once, work in smaller sections. Use the squeegee to press the vinyl onto the surface, moving from the center outward. This technique helps to push out air bubbles and ensures a smooth application.

6. Keep an Eye on Air Bubbles

Air bubbles are a common issue in panel wrapping. If you notice any, use a pin to prick them and gently push out the air with your squeegee. For larger bubbles, consider using the heat gun to soften the vinyl before pushing the air out.

7. Trim Excess Vinyl Carefully

Once the vinyl is applied, it’s time to trim the excess. Use a sharp utility knife along the edges of the panel for a clean cut. Take your time with this step to avoid cutting too deep and damaging the panel underneath.

8. Finish with a Seal

To enhance durability, consider applying a sealant or protective coat over the wrapped surface. This step will help protect against UV damage, scratches, and peeling. Always follow the manufacturer’s instructions for the best results.

Common Mistakes to Avoid

Even experienced wrappers can make mistakes. Here are some common pitfalls to watch out for:

  • Skipping Surface Prep: Never underestimate the importance of a clean surface. Proper cleaning prevents adhesive failure.
  • Applying Vinyl in Cold Conditions: Cold temperatures can make vinyl stiff and harder to work with. Aim for a temperature between 60°F and 80°F for optimal results.
  • Rushing the Process: Take your time to ensure each step is done correctly. Haste can lead to mistakes that are hard to correct.

Conclusion

Mastering panel wrapping takes practice, but with the right techniques and careful attention to detail, anyone can achieve a professional finish. By following these essential panel wrapping tips, you can ensure a smooth application and long-lasting durability for any project. Remember, patience is key, and each project is an opportunity to refine your skills. Happy wrapping!

Mastering the Heat Gun: Elevate Your Wrapping Skills with Precision Techniques

match, arrival, track, finish line, competition, sport, stadium, athletics, finish line, finish line, finish line, finish line, finish line

Mastering the Heat Gun: Elevate Your Wrapping Skills with Precision Techniques

When it comes to wrapping vehicles, furniture, or other items, achieving a professional finish requires the right tools and techniques. One of the most essential tools in this process is the heat gun. This versatile device not only helps in shaping and smoothing the wrap but also enhances its durability. In this guide, we will explore effective heat gun wrapping techniques that will help you achieve stunning results.

Understanding the Heat Gun

A heat gun is an electric device that blows hot air, typically ranging from 100°F to over 1,000°F, making it perfect for various applications, including wrapping. Before diving into the techniques, it’s important to familiarize yourself with the basic components of a heat gun:

  • Temperature Control: Allows you to adjust the heat output according to the material you are working with.
  • Airflow Settings: Provides options for different airflow levels, giving you control over how concentrated the heat is.
  • Nozzle Attachments: Different nozzles can be used to direct the heat in specific ways, improving precision.

Essential Techniques for Effective Wrapping

1. Preparing Your Surface

Before applying any wrap, it is crucial to prepare the surface. Here are some steps to ensure optimal adhesion:

  • Clean the surface thoroughly to remove dirt, grease, and other contaminants.
  • Ensure the surface is dry and smooth to prevent any imperfections in the wrap.
  • If necessary, sand down any rough spots to create an even surface for wrapping.

2. Choosing the Right Temperature

Choosing the correct temperature setting on your heat gun is vital for achieving the best results. Here’s how to determine the right temperature:

  • For vinyl wraps, a temperature between 200°F and 300°F is generally ideal.
  • Test the wrap material on a small area first to ensure it can withstand the heat without damage.
  • Adjust the temperature based on the specific type of vinyl or material you are using.

3. Mastering the Heat Application

The way you apply heat can make a significant difference in the quality of your wrap. Follow these tips for effective heat application:

  • Keep Moving: Always keep the heat gun moving to avoid overheating any one spot, which can cause bubbling or melting.
  • Maintain Distance: Hold the heat gun approximately 6 to 12 inches away from the surface to prevent excessive heat concentration.
  • Use the Right Nozzle: For larger areas, use a wide nozzle to distribute heat evenly; for detailed work, a concentrated nozzle is ideal.

4. Stretching and Smoothing the Wrap

Once the wrap is applied, you may need to stretch and smooth it to eliminate wrinkles:

  • Gently heat the vinyl to make it more pliable, allowing it to conform to curves and contours without tearing.
  • Use a squeegee to press down the wrap as you heat it, ensuring a tight fit.
  • Work in sections, applying heat to one area before moving on to the next.

5. Sealing the Edges

To ensure a long-lasting finish, sealing the edges of the wrap is essential:

  • Apply heat to the edges of the wrap to activate the adhesive and help it bond securely to the surface.
  • Press the edges down firmly with the squeegee to prevent lifting.
  • Consider using a heat-resistant tape for added security, especially in high-wear areas.

Common Mistakes to Avoid

Even seasoned professionals can make mistakes when using a heat gun. Here are some common pitfalls to watch out for:

  • Overheating: Excessive heat can damage the wrap and the underlying surface, leading to peeling and bubbling.
  • Inconsistency: Uneven heat application can lead to noticeable imperfections in the final finish.
  • Ignoring the Material: Different materials require different heat settings; always check manufacturer guidelines.

Conclusion

Mastering the heat gun wrapping technique can dramatically improve the quality of your wraps, whether you’re working on vehicles, furniture, or other items. By preparing your surface, choosing the right temperature, and applying heat with precision, you can achieve a professional-grade finish that enhances both the look and durability of your projects. With practice and attention to detail, you’ll elevate your wrapping skills and achieve stunning results!

Master the Art of DIY Car Wrapping: Tips and Tricks for a Flawless Finish

bubble wrap, bubble, wrap, transparent, packaging, material, protection, air, insulation, package, protect, delivery, parcel, textured, wrapping, bubblewrap, soft, fragile, packing, cushion, plastic, gray bubbles, bubble wrap, bubble wrap, bubble wrap, bubble wrap, bubble wrap, bubblewrap, bubblewrap

Master the Art of DIY Car Wrapping

Wrapping your car can be a fun and rewarding project that transforms your vehicle’s appearance. However, achieving a professional look requires some knowledge and skill. In this guide, we’ll share essential DIY car wrapping tips to help you wrap your car like a pro.

Choosing the Right Materials

The first step in achieving a flawless finish is selecting the right materials. Here are some key factors to consider:

  • Vinyl Wrap: Opt for high-quality cast vinyl, which is more durable and easier to work with than calendared vinyl. Brands like 3M, Avery Dennison, and Oracal offer excellent options.
  • Application Tools: Invest in a squeegee, utility knife, heat gun, and a measuring tape. These tools are essential for a smooth application and precise cuts.
  • Surface Cleaner: Use a surface cleaner or rubbing alcohol to remove any dirt, wax, or grease from your car’s surface before wrapping.

Preparing Your Vehicle

Preparation is key to a successful wrap job. Follow these steps to ensure your vehicle is ready:

  • Wash Your Car: Start by thoroughly washing your car to remove any contaminants. Pay extra attention to the areas that will be wrapped.
  • Dry Completely: After washing, dry your vehicle completely to prevent water from getting trapped under the wrap.
  • Remove Obstructions: Take off any trim, badges, or parts that can be removed easily to ensure a seamless application.
  • Inspect for Damage: Check for scratches or dents that may affect the wrap’s appearance. Repair any damage before proceeding.

Applying the Wrap Smoothly

Now that your vehicle is prepped and you have the right materials, it’s time to apply the wrap. Here are some tips for a smooth application:

  • Work in Sections: Start with one section at a time. This helps you focus and reduces the risk of errors.
  • Use Heat: Apply heat with a heat gun to make the vinyl more pliable, especially around curves and edges. Be careful not to overheat, as this can damage the vinyl.
  • Stretch Carefully: When applying the wrap, stretch it gently to avoid bubbles and wrinkles. Use the squeegee to push out air as you go.
  • Trim Excess Vinyl: Once you’ve applied the wrap, use a utility knife to trim any excess vinyl carefully. Always cut away from the car’s surface to avoid scratches.
  • Seal the Edges: Use heat to seal the edges of the wrap for a more durable finish and to prevent peeling.

Post-Application Care

After you’ve completed your wrap, proper care is essential for maintaining its appearance:

  • Avoid Washing: Refrain from washing your car for at least 48 hours to allow the wrap to adhere fully.
  • Hand Wash Only: When washing your wrapped car, opt for a hand wash with gentle soap. Avoid automatic car washes, as they can damage the wrap.
  • Use a Protectant: Consider applying a vinyl protectant to enhance the wrap’s longevity and shine.

Common Mistakes to Avoid

To achieve a professional look, avoid these common mistakes:

  • Skipping Preparation: Never underestimate the importance of prepping your vehicle. A clean surface is vital for a successful wrap.
  • Using Low-Quality Vinyl: Cheap vinyl can lead to premature fading and peeling. Always choose high-quality materials.
  • Rushing the Process: Take your time during application. Rushing can lead to mistakes and a less-than-perfect finish.

Final Thoughts

DIY car wrapping is an art that requires practice and patience. By following these DIY car wrapping tips and taking your time with the process, you can achieve a stunning and professional-looking finish for your vehicle. Whether you want to change your car’s color, add graphics, or protect the original paint, a well-executed wrap can transform your ride. Happy wrapping!

Vinyl Wrap vs. Paint: Which is the Best Choice for Your Car?

opel, gt, antique car, youngtimer, sports car, classic, historical, vehicle, automobile, nostalgic, car, sportscar, sixties, icon, germany, paint, industrial, industry, rüsselsheim, car wallpapers, retro

Vinyl Wrap vs. Paint: Which is the Best Choice for Your Car?

When it comes to customizing your vehicle, one of the most common questions car enthusiasts ask is, “Is vinyl wrap better than paint?” The answer depends on several factors, including cost, durability, and aesthetic preferences. In this post, we will explore the pros and cons of both vinyl wraps and traditional paint jobs to help you make an informed decision for your car.

Understanding Vinyl Wraps

Vinyl wraps are adhesive films applied directly over your car’s existing paint. They come in a variety of colors, finishes, and textures, allowing for a high degree of customization.

Pros of Vinyl Wraps

  • Cost-Effective: Generally, vinyl wraps are less expensive than a full paint job, making them a popular choice for budget-conscious car owners.
  • Reversible: If you decide to change the look of your car, vinyl wraps can be removed without damaging the original paint underneath.
  • Quick Installation: Vinyl wraps can typically be applied in a few days, whereas paint jobs can take weeks to cure fully.
  • Variety of Options: With an array of colors and finishes (including matte, gloss, and metallic), vinyl wraps offer more versatility than traditional paint.
  • Protection: Vinyl wraps provide a layer of protection against UV rays, minor scratches, and other environmental factors.

Cons of Vinyl Wraps

  • Durability: While vinyl wraps are relatively durable, they are not as long-lasting as high-quality paint jobs. Depending on the quality of the wrap and maintenance, they may last between 3 to 7 years.
  • Maintenance: Vinyl wraps require specific cleaning methods and products to maintain their appearance and longevity.
  • Vulnerability to Damage: Sharp objects or extreme weather conditions can damage vinyl wraps more easily than paint.

Understanding Traditional Paint Jobs

Traditional paint jobs involve applying several layers of paint to a vehicle’s surface. This process can be more labor-intensive and time-consuming than applying a vinyl wrap.

Pros of Traditional Paint Jobs

  • Durability: Paint jobs can last significantly longer than vinyl wraps—often exceeding a decade with proper care.
  • High Resistance: Quality paint jobs are more resistant to scratches and damage from environmental factors.
  • Seamless Finish: A professional paint job can provide a flawless, seamless finish that some may prefer over the look of vinyl.
  • Higher Resale Value: A well-maintained paint job can enhance your vehicle’s resale value, as it is often seen as more permanent and desirable.

Cons of Traditional Paint Jobs

  • Cost: Paint jobs are generally more expensive than vinyl wraps, especially for high-quality finishes.
  • Time-Consuming: A full paint job can take significantly longer to complete, often requiring weeks for curing time.
  • Permanent Change: Unlike vinyl wraps, paint is not easily reversible. If you want to change your car’s color or finish, it often requires a full repaint.

Making Your Decision

When deciding between vinyl wrap and paint, consider the following factors:

1. Budget

Assess your budget for the project. If you’re looking for a cost-effective solution, a vinyl wrap might be the better choice.

2. Intended Use

If you plan to keep the vehicle for a long time and prioritize durability, a traditional paint job could be a more suitable option.

3. Aesthetic Preferences

Think about the look you want to achieve. Vinyl wraps offer more creative options, while paint can provide a classic, polished finish.

4. Resale Value

Consider how each option might impact your car’s resale value. A high-quality paint job may be more appealing to potential buyers.

5. Maintenance

Evaluate how much maintenance you’re willing to commit to. Vinyl wraps require specific care, while paint jobs need regular waxing and polishing.

Conclusion

In the debate of “Is vinyl wrap better than paint?”, there is no one-size-fits-all answer. Both options have their unique advantages and disadvantages. Your decision should be based on your personal needs, budget, and the look you want to achieve. Whether you choose to go with a vinyl wrap or a traditional paint job, ensuring that the work is done by a professional will significantly impact the final result. Happy customizing!

Transform Your Ride: The Ultimate Guide to Car Wrap Installation

woman, model, hippie, fashion, style, stylish woman, car wallpapers, volkswagen, beetle, car, classic, nature, vintage, automobile, automotive, beach, sand, seashore, vehicle, classic car, boots, leather boots, modeling, pose, posing

Transform Your Ride: The Ultimate Guide to Car Wrap Installation

Are you looking to give your vehicle a fresh look without the commitment of a new paint job? Car wrap installation is an excellent way to enhance your vehicle’s appearance, protect its original paint, and express your personal style. In this guide, we will explore the art of car wrap installation, the benefits, the materials needed, and expert tips to achieve a flawless finish.

What is Car Wrap Installation?

Car wrap installation involves applying a vinyl film over the surface of your vehicle. This film can change the color, add designs, or showcase graphics, allowing you to customize your ride. Car wraps are removable, making them a versatile option for those who want to change their car’s look without permanent alterations.

Benefits of Car Wrap Installation

  • Cost-Effective: Compared to a full paint job, car wraps are generally more affordable.
  • Variety of Designs: With countless colors and finishes available, the design options are virtually limitless.
  • Paint Protection: A car wrap protects the original paint from UV rays, minor scratches, and weathering.
  • Easy Removal: Car wraps can be removed without damaging the paint underneath, making it easy to revert to the original look.
  • Branding Opportunities: Businesses can use car wraps for advertising, turning vehicles into mobile billboards.

Materials Needed for Car Wrap Installation

Before diving into the installation process, gather the following materials:

  • Vinyl Wrap: Choose high-quality vinyl designed for vehicle wraps.
  • Application Tools: Squeegees, utility knives, and a heat gun are essential for a smooth application.
  • Cleaning Supplies: Isopropyl alcohol, microfiber cloths, and a degreaser will help prepare the surface.
  • Measuring Tools: A tape measure and a cutting mat will ensure precise cuts.
  • Gloves: To avoid fingerprints and maintain a clean surface during installation.

Step-by-Step Process for Car Wrap Installation

1. Prepare the Vehicle

Start by thoroughly cleaning your vehicle. Use a degreaser and isopropyl alcohol to remove any dirt, grease, or wax. This step is crucial for ensuring the vinyl adheres properly.

2. Measure and Cut the Vinyl

Carefully measure the areas you plan to wrap and cut the vinyl accordingly. It’s a good idea to leave some extra material around the edges to ensure complete coverage.

3. Heat the Vinyl

Using a heat gun, lightly warm the vinyl before application. This makes the material more pliable and easier to work with, especially around curves and corners.

4. Apply the Vinyl

Starting from one edge, carefully lay the vinyl onto the surface. Use a squeegee to smooth out bubbles and wrinkles. Work slowly, ensuring the film adheres evenly.

5. Trim Excess Material

Once the vinyl is applied, use a utility knife to trim away the excess material along the edges. Be cautious not to cut into the vehicle’s paint.

6. Post-Installation Heat Treatment

After the wrap is applied, use the heat gun again to set the vinyl. This step helps ensure that the wrap adheres properly and conforms to the vehicle’s shape.

Expert Tips for a Flawless Finish

  • Work in a Controlled Environment: Ideally, perform the installation in a warm, dry space to avoid moisture issues.
  • Take Your Time: Rushing through the process can lead to mistakes. Patience is key for a professional-looking wrap.
  • Practice Before You Start: If you’re new to car wrap installation, consider practicing on a smaller surface to get the hang of the technique.
  • Seek Help if Needed: If the project feels overwhelming, don’t hesitate to enlist the help of a professional.

Conclusion

Car wrap installation is a fantastic way to transform your vehicle while also protecting its original finish. With the right materials, preparation, and approach, you can achieve stunning results that will turn heads on every drive. Whether you’re looking to personalize your ride or promote your business, a well-executed car wrap can make a significant impact.