Mastering the Art of Panel Wrapping: Essential Tips for a Flawless Finish

gift, packaging, cord, christmas gift, wrapped up, christmas, wrapping paper, wrap up, gift wrapping

Mastering the Art of Panel Wrapping: Essential Tips for a Flawless Finish

Panel wrapping is an art that combines precision, technique, and creativity. Whether you’re looking to wrap a vehicle, furniture, or any flat surface, mastering this skill can lead to professional-grade results. In this guide, we’ll explore essential panel wrapping tips to help you achieve a smooth application and ensure long-lasting durability for any project.

Understanding the Basics of Panel Wrapping

Before diving into the techniques, it’s crucial to understand the materials and tools you’ll need for a successful panel wrapping project:

  • Vinyl Wrap: Choose high-quality vinyl that suits your project. Look for cast vinyl for vehicles, as it’s more flexible and durable.
  • Application Tools: Essential tools include a squeegee, utility knife, heat gun, and a soft cloth.
  • Surface Preparation: Clean the surface thoroughly to remove dust, grease, or any contaminants.

Essential Panel Wrapping Tips for a Flawless Finish

1. Prepare Your Workspace

Creating a suitable workspace is vital. Ensure you have ample lighting and a clean, flat surface to work on. A clutter-free environment will help you focus and reduce the risk of errors.

2. Measure and Cut Accurately

Accurate measurements are key to avoiding waste. Measure the panel you intend to wrap and add a few extra inches to your vinyl for an allowance. Use a sharp utility knife for clean cuts to ensure precision.

3. Use Heat to Your Advantage

Applying heat to the vinyl can make it more pliable and easier to stretch. Use a heat gun to warm the vinyl slightly before application, especially around curves or edges. However, be cautious not to overheat, as this can damage the vinyl.

4. Start from One Edge

Begin the application from one edge of the panel. Peel back a small portion of the backing and align the vinyl with the panel. This method allows you to control the placement better and reduces the chances of air bubbles forming.

5. Work in Sections

Instead of trying to apply the vinyl all at once, work in smaller sections. Use the squeegee to press the vinyl onto the surface, moving from the center outward. This technique helps to push out air bubbles and ensures a smooth application.

6. Keep an Eye on Air Bubbles

Air bubbles are a common issue in panel wrapping. If you notice any, use a pin to prick them and gently push out the air with your squeegee. For larger bubbles, consider using the heat gun to soften the vinyl before pushing the air out.

7. Trim Excess Vinyl Carefully

Once the vinyl is applied, it’s time to trim the excess. Use a sharp utility knife along the edges of the panel for a clean cut. Take your time with this step to avoid cutting too deep and damaging the panel underneath.

8. Finish with a Seal

To enhance durability, consider applying a sealant or protective coat over the wrapped surface. This step will help protect against UV damage, scratches, and peeling. Always follow the manufacturer’s instructions for the best results.

Common Mistakes to Avoid

Even experienced wrappers can make mistakes. Here are some common pitfalls to watch out for:

  • Skipping Surface Prep: Never underestimate the importance of a clean surface. Proper cleaning prevents adhesive failure.
  • Applying Vinyl in Cold Conditions: Cold temperatures can make vinyl stiff and harder to work with. Aim for a temperature between 60°F and 80°F for optimal results.
  • Rushing the Process: Take your time to ensure each step is done correctly. Haste can lead to mistakes that are hard to correct.

Conclusion

Mastering panel wrapping takes practice, but with the right techniques and careful attention to detail, anyone can achieve a professional finish. By following these essential panel wrapping tips, you can ensure a smooth application and long-lasting durability for any project. Remember, patience is key, and each project is an opportunity to refine your skills. Happy wrapping!

Essential Vinyl Wrapping Tools: Elevate Your DIY Projects with Professional Results

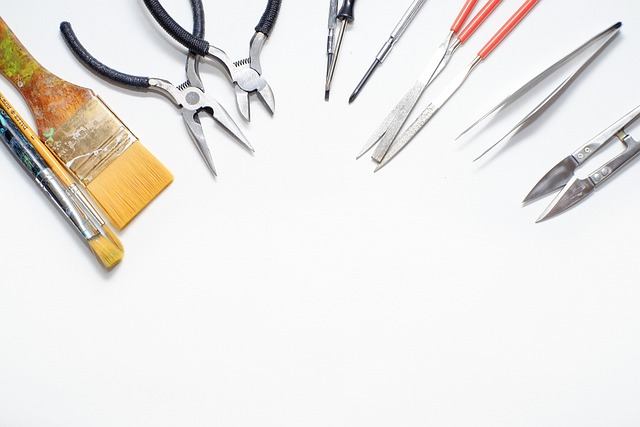
tools, diy, tool, work, repair, craftsmen, equipment, screwdriver, fix, brush, scissors, rasp, tweezers, pliers, improvement, handyman, repairman, isolated, diy, diy, diy, diy, diy, handyman

Essential Vinyl Wrapping Tools: Elevate Your DIY Projects with Professional Results

If you’re looking to transform your DIY projects into stunning, professional-looking masterpieces, vinyl wrapping is an excellent option. Whether you’re wrapping a vehicle, furniture, or any other surface, having the right vinyl wrapping tools is crucial for achieving flawless results. In this blog post, we will explore the must-have tools for vinyl wrapping and share expert tips on how to use them effectively.

Must-Have Vinyl Wrapping Tools

1. Vinyl Wrap

The most important element of any vinyl wrapping project is, of course, the vinyl itself. There are various types of vinyl available, such as cast vinyl, calendared vinyl, and specialty films. Choose a high-quality vinyl that suits your project needs, keeping in mind factors like durability, stretchability, and finish.

2. Utility Knife

A sharp utility knife is essential for cutting vinyl accurately. Look for a knife that allows for easy blade replacement and has a comfortable grip. Always ensure your blade is sharp for clean cuts and to avoid tearing the vinyl.

3. Squeegee

A squeegee is a vital tool for applying vinyl smoothly and preventing air bubbles. Opt for a squeegee with a felt edge to avoid scratching the vinyl. You can also find squeegees with different shapes and sizes to help you reach tight corners and curves.

4. Heat Gun

A heat gun is indispensable for vinyl wrapping, as it helps to stretch and conform the vinyl to the surface. The heat softens the vinyl, making it easier to manipulate. Be cautious when using a heat gun; keep it at a safe distance and move it around to prevent overheating any one spot.

5. Tape Measure and Ruler

Accurate measurements are key to a successful wrap. A tape measure will help you determine how much vinyl you need, while a ruler can assist in making straight cuts. Consider using a measuring tape with a locking mechanism for ease of use.

6. Application Fluid

Application fluid, also known as slip solution, can be sprayed onto the surface before applying the vinyl. This fluid allows for easier positioning of the vinyl and helps to remove air bubbles during application. Make sure to use a solution that is compatible with your vinyl.

7. Gloves

Wearing gloves is important to prevent fingerprints and oils from your hands from getting onto the vinyl. Choose gloves that provide a good grip while still allowing for dexterity.

8. Cleaning Supplies

Before wrapping, it’s essential to clean the surface thoroughly. Use isopropyl alcohol and a lint-free cloth to remove dirt, grease, and wax. This preparation step is vital for ensuring proper adhesion of the vinyl.

Expert Tips for Flawless Vinyl Application

1. Take Your Time

Rushing through the application can lead to mistakes. Take your time to measure, cut, and apply the vinyl carefully for the best results.

2. Work in a Controlled Environment

Temperature and humidity can significantly impact the vinyl application process. Aim to work in a controlled environment, ideally between 60°F and 80°F, to ensure optimal adhesion and flexibility of the vinyl.

3. Use a Heat Gun Wisely

When using a heat gun, always keep it moving to avoid burning the vinyl. It’s also best to start with a lower temperature and gradually increase it as needed.

4. Post-Heating

After wrapping, use the heat gun again to post-heat the vinyl. This step helps to set the adhesive and can improve the durability of the wrap.

5. Trim with Precision

When trimming the excess vinyl, use your utility knife carefully. Always cut away from the surface to prevent damaging it and to achieve a clean edge.

Conclusion

With the right vinyl wrapping tools and techniques, you can elevate your DIY projects to professional standards. Invest in quality tools, prepare your workspace, and follow the expert tips provided to achieve stunning results. Whether you’re wrapping a car, a laptop, or furniture, these tools will help you create a flawless finish that will impress.

Mastering the Heat Gun: Elevate Your Wrapping Skills with Precision Techniques

match, arrival, track, finish line, competition, sport, stadium, athletics, finish line, finish line, finish line, finish line, finish line

Mastering the Heat Gun: Elevate Your Wrapping Skills with Precision Techniques

When it comes to wrapping vehicles, furniture, or other items, achieving a professional finish requires the right tools and techniques. One of the most essential tools in this process is the heat gun. This versatile device not only helps in shaping and smoothing the wrap but also enhances its durability. In this guide, we will explore effective heat gun wrapping techniques that will help you achieve stunning results.

Understanding the Heat Gun

A heat gun is an electric device that blows hot air, typically ranging from 100°F to over 1,000°F, making it perfect for various applications, including wrapping. Before diving into the techniques, it’s important to familiarize yourself with the basic components of a heat gun:

  • Temperature Control: Allows you to adjust the heat output according to the material you are working with.
  • Airflow Settings: Provides options for different airflow levels, giving you control over how concentrated the heat is.
  • Nozzle Attachments: Different nozzles can be used to direct the heat in specific ways, improving precision.

Essential Techniques for Effective Wrapping

1. Preparing Your Surface

Before applying any wrap, it is crucial to prepare the surface. Here are some steps to ensure optimal adhesion:

  • Clean the surface thoroughly to remove dirt, grease, and other contaminants.
  • Ensure the surface is dry and smooth to prevent any imperfections in the wrap.
  • If necessary, sand down any rough spots to create an even surface for wrapping.

2. Choosing the Right Temperature

Choosing the correct temperature setting on your heat gun is vital for achieving the best results. Here’s how to determine the right temperature:

  • For vinyl wraps, a temperature between 200°F and 300°F is generally ideal.
  • Test the wrap material on a small area first to ensure it can withstand the heat without damage.
  • Adjust the temperature based on the specific type of vinyl or material you are using.

3. Mastering the Heat Application

The way you apply heat can make a significant difference in the quality of your wrap. Follow these tips for effective heat application:

  • Keep Moving: Always keep the heat gun moving to avoid overheating any one spot, which can cause bubbling or melting.
  • Maintain Distance: Hold the heat gun approximately 6 to 12 inches away from the surface to prevent excessive heat concentration.
  • Use the Right Nozzle: For larger areas, use a wide nozzle to distribute heat evenly; for detailed work, a concentrated nozzle is ideal.

4. Stretching and Smoothing the Wrap

Once the wrap is applied, you may need to stretch and smooth it to eliminate wrinkles:

  • Gently heat the vinyl to make it more pliable, allowing it to conform to curves and contours without tearing.
  • Use a squeegee to press down the wrap as you heat it, ensuring a tight fit.
  • Work in sections, applying heat to one area before moving on to the next.

5. Sealing the Edges

To ensure a long-lasting finish, sealing the edges of the wrap is essential:

  • Apply heat to the edges of the wrap to activate the adhesive and help it bond securely to the surface.
  • Press the edges down firmly with the squeegee to prevent lifting.
  • Consider using a heat-resistant tape for added security, especially in high-wear areas.

Common Mistakes to Avoid

Even seasoned professionals can make mistakes when using a heat gun. Here are some common pitfalls to watch out for:

  • Overheating: Excessive heat can damage the wrap and the underlying surface, leading to peeling and bubbling.
  • Inconsistency: Uneven heat application can lead to noticeable imperfections in the final finish.
  • Ignoring the Material: Different materials require different heat settings; always check manufacturer guidelines.

Conclusion

Mastering the heat gun wrapping technique can dramatically improve the quality of your wraps, whether you’re working on vehicles, furniture, or other items. By preparing your surface, choosing the right temperature, and applying heat with precision, you can achieve a professional-grade finish that enhances both the look and durability of your projects. With practice and attention to detail, you’ll elevate your wrapping skills and achieve stunning results!

Mastering the Art of Seamless Vinyl Wrap: Expert Techniques Revealed

go-kart, racing, drive, sport, finish, flag, carting, green sports, finish, finish, finish, finish, finish, carting

Mastering the Art of Seamless Vinyl Wrap: Expert Techniques Revealed

Vinyl wrapping has evolved into a popular method for enhancing the aesthetics of vehicles. With the right techniques, you can achieve a flawless and seamless finish that not only looks stunning but also adds durability. In this post, we’ll explore the latest seamless vinyl wrap methods used by professionals to elevate your vinyl wrapping game.

The Importance of Seamless Vinyl Wrap

A seamless vinyl wrap is crucial for several reasons:

  • Aesthetics: A seamless finish provides a clean and polished look that enhances the vehicle’s overall appearance.
  • Durability: Properly applied vinyl wraps are more resistant to wear and tear, ensuring longevity.
  • Value: A quality wrap can increase the resale value of a vehicle by protecting the original paint underneath.

Essential Tools and Materials

Before diving into the techniques, it’s important to gather the right tools and materials. Here’s a list of essentials:

  • High-quality vinyl wrap
  • Heat gun
  • Application squeegee
  • Utility knife
  • Surface cleaner
  • Measuring tape
  • Masking tape

Techniques for a Flawless Vinyl Wrap

1. Surface Preparation

Proper surface preparation is the foundation of a successful wrap. Follow these steps:

  • Clean the surface thoroughly with a surface cleaner to remove dirt, oil, and wax.
  • Inspect for imperfections such as scratches or dents, and repair them before applying the vinyl.
  • Use masking tape to outline areas that will not be wrapped, ensuring clean edges.

2. Measuring and Cutting

Accurate measuring and cutting are crucial for seamless application:

  • Measure the area to be wrapped carefully, allowing for extra material at the edges.
  • Lay the vinyl flat and cut it to size, ensuring that you have enough overlap for seams.
  • Use a utility knife to create clean edges and avoid jagged cuts.

3. Heating the Vinyl

One of the most important steps to achieve a seamless finish is heating the vinyl:

  • Use a heat gun to warm the vinyl slightly before application. This makes it more pliable and easier to work with.
  • Be cautious not to overheat, as this can cause damage or distortion in the vinyl.

4. Application Techniques

Applying the vinyl correctly is essential for a seamless finish:

  • Start from one side and gradually work your way across, using the application squeegee to smooth out air bubbles.
  • Apply pressure evenly and continuously, ensuring that the vinyl adheres well to the surface.
  • Use your heat gun as needed during application to help conform the vinyl to curves and contours.

5. Trimming and Finishing

Once the vinyl is applied, it’s time to trim and finish:

  • Carefully trim excess vinyl along edges with a utility knife, ensuring a clean line.
  • Use the heat gun again to shrink and seal the edges of the wrap, preventing peeling.
  • Inspect the wrap for any imperfections and address them immediately for a perfect finish.

Common Mistakes to Avoid

Even seasoned professionals can encounter issues. Here are common mistakes to watch out for:

  • Skipping surface preparation can lead to poor adhesion.
  • Not allowing enough overlap can cause seams to become visible.
  • Overheating the vinyl can result in distortion and loss of color.

Conclusion

Mastering the art of seamless vinyl wrap requires practice, patience, and the right techniques. By utilizing the expert methods outlined above, you can achieve a flawless finish that enhances the aesthetics and durability of your vehicle. Remember, the key to a successful wrap lies in preparation, application, and finishing touches. Happy wrapping!

Mastering the Art of Heat Gun Wrapping: Tips and Techniques for a Flawless Finish

warmly, diesel, heat, heat gun, device, heating

Mastering the Art of Heat Gun Wrapping

Are you looking to take your DIY projects to the next level? The heat gun wrapping technique can help you achieve a professional finish that will impress even the most discerning eyes. Whether you’re wrapping furniture, creating custom designs, or simply adding a protective layer to an object, mastering the heat gun wrapping technique is essential for a flawless result. In this post, we’ll explore expert tips and techniques to elevate your wrapping game.

What is Heat Gun Wrapping?

Heat gun wrapping involves using a heat gun to manipulate materials such as vinyl, plastic, or film. By applying heat, you can make these materials more pliable, allowing them to conform to the shape of the object you are wrapping. This technique is widely used in automotive, furniture, and craft projects.

Essential Tools for Heat Gun Wrapping

Before diving into the wrapping process, ensure you have the right tools at your disposal. Here’s a list of essential tools:

  • Heat Gun: Invest in a good-quality heat gun that offers adjustable temperature settings.
  • Vinyl Wrap: Choose high-quality vinyl or film that suits your project.
  • Utility Knife: For precise cutting of the material.
  • Application Tools: Use tools like a squeegee or felt applicator to smooth out the material.
  • Measuring Tape: For accurate measurements of the surfaces you will be wrapping.
  • Protective Gear: Safety goggles and gloves to protect against heat and sharp tools.

Preparation: Setting the Stage for Success

Proper preparation is crucial for achieving a flawless finish. Follow these steps:

  1. Clean the Surface: Ensure that the surface you are wrapping is clean, dry, and free of any dust or debris.
  2. Measure and Cut: Accurately measure the area you want to wrap and cut the vinyl slightly larger than needed.
  3. Plan Your Design: If you’re using multiple pieces, plan how they will fit together to avoid seams.

Executing the Heat Gun Wrapping Technique

Now that you’re prepared, it’s time to execute the heat gun wrapping technique. Here are some tips to ensure a seamless application:

1. Heating the Vinyl

Begin by turning on your heat gun and setting it to a low temperature. Hold it about 6 to 12 inches away from the vinyl. Move the heat gun back and forth to avoid overheating any one spot:

  • Focus on one section at a time to prevent the vinyl from cooling before you can apply it.
  • Watch for the vinyl to become slightly glossy; this indicates it’s at the right temperature.

2. Applying the Vinyl

Carefully place the heated vinyl onto the surface. Start from one end and gradually work your way to the other:

  • Use a squeegee to press the vinyl down, pushing out any air bubbles as you go.
  • For curves and edges, use your heat gun to further soften the vinyl, allowing it to conform better to the shape.

3. Trimming Excess Material

Once the vinyl is applied and smoothed out, let it cool for a few minutes before trimming the excess:

  • Use a sharp utility knife for clean edges.
  • Be careful not to cut too deep; you want to avoid damaging the underlying surface.

4. Final Touches

After trimming, take a moment to inspect your work:

  • Check for any bubbles or imperfections and use the heat gun to fix them.
  • For a perfect finish, apply a heat seal around the edges to ensure durability.

Common Mistakes to Avoid

Even experienced DIYers can make mistakes when using the heat gun wrapping technique. Here are some common pitfalls to avoid:

  • Overheating: Too much heat can cause the vinyl to warp or bubble.
  • Ignoring Air Bubbles: Failing to remove air bubbles can lead to an uneven finish.
  • Rushing the Process: Take your time to ensure each step is executed properly.

Conclusion

Mastering the heat gun wrapping technique can transform your DIY projects, giving them a polished and professional appearance. By following these tips and techniques, you’ll be well on your way to achieving flawless finishes on all your wrapping endeavors. Remember, practice makes perfect, so don’t hesitate to experiment and refine your skills!

Essential Vinyl Wrapping Tools: A Must-Have Guide for Beginners

tools, drill, drill bit, equipment, cnc cutting tools, cnc end mill, milling cutter tool, drilling head, metallic drill bits, tools, tools, tools, tools, tools, drill, drill, drill bit

Essential Vinyl Wrapping Tools: A Must-Have Guide for Beginners

If you’re looking to dive into the world of vinyl wrapping, having the right tools can make all the difference. Whether you’re wrapping a car, furniture, or decorative items, the right vinyl wrapping tools will ensure that your project is not only a success but also looks professional. In this guide, we’ll cover the essential tools every beginner needs to master the art of vinyl wrapping.

1. Precision Cutting Blades

One of the most important vinyl wrapping tools you’ll need is a precision cutting blade. A sharp, high-quality blade allows for clean cuts and precise edges, which are crucial for achieving a flawless finish. Look for:

  • Retractable utility knives: Great for general cutting tasks.
  • Craft knives: Perfect for intricate designs and detailed cuts.

2. Squeegees

Squeegees are essential for applying vinyl smoothly and removing air bubbles. They help to ensure a tight bond between the vinyl and the surface. Here are a few types of squeegees you should consider:

  • Felt-edged squeegees: Ideal for delicate surfaces to prevent scratches.
  • Plastic squeegees: Versatile and effective for most applications.

3. Heat Gun

A heat gun is a vital tool for vinyl wrapping, especially when working with curved surfaces. Applying heat helps the vinyl conform to the shape of the surface, ensuring a smooth finish. Look for a heat gun with adjustable temperature settings for better control.

4. Measuring Tools

Accurate measurements are crucial in vinyl wrapping to avoid waste and ensure a perfect fit. Here are the measuring tools you should have:

  • Tape measure: Essential for taking accurate measurements of larger surfaces.
  • Ruler or straight edge: Great for marking straight lines for cutting.

5. Application Fluid

Using application fluid can simplify the vinyl application process. This fluid creates a slippery surface, allowing you to reposition the vinyl before it adheres completely. It also helps to reduce air bubbles during application.

6. Gloves

Wearing gloves while working with vinyl can prevent fingerprints and smudges from ruining your project. It also protects your hands from any sharp edges while cutting.

7. Cleaning Supplies

Before applying vinyl, it’s essential to clean the surface thoroughly. Dust, dirt, and oils can prevent the vinyl from adhering properly. Make sure to have the following cleaning supplies:

  • Isopropyl alcohol: Effective for cleaning surfaces without leaving residue.
  • Microfiber cloths: Ideal for wiping down surfaces without scratching.

8. Safety Gear

Safety should always be a priority. When working with sharp tools and heat, it’s important to protect yourself. Consider using:

  • Safety glasses: To protect your eyes from debris.
  • Cut-resistant gloves: To protect your hands from cuts while cutting the vinyl.

9. Vinyl Rollers

Vinyl rollers are useful for applying pressure to the vinyl, especially on larger surfaces. They help ensure that the vinyl adheres well and helps to eliminate any air pockets that may form during installation.

10. A Good Quality Vinyl

Lastly, don’t forget that the quality of the vinyl itself is crucial. Investing in good quality vinyl will not only make your job easier, but it will also result in a better-looking finish.

Conclusion

Equipping yourself with these essential vinyl wrapping tools will set you on the right path to mastering this skill. Whether you’re a beginner or looking to refine your technique, having the right tools is key to achieving a professional-looking finish on any project. Start gathering these tools, and you’ll be well on your way to becoming a vinyl wrapping expert!

Essential Vinyl Wrapping Tools for a Flawless Finish

vegetables, slice, knife, chef's knife, bell peppers, leeks, carrots, onion, garlic, food, eat, red peppers, peppers, capsicums, healthy, cut, cook, preparation, food preparation, ingredients, vegetables, vegetables, vegetables, knife, knife, knife, knife, knife, bell peppers, onion, onion, food, peppers, cook, cook

Essential Vinyl Wrapping Tools for a Flawless Finish

Vinyl wrapping is an increasingly popular method for customizing vehicles and other surfaces, offering a professional look without the permanence of paint. Whether you’re a DIY enthusiast or a seasoned pro, having the right vinyl wrapping tools is crucial for achieving a flawless finish. In this guide, we’ll explore the must-have tools to ensure smooth application and long-lasting results.

1. Vinyl Wrap Film

Before diving into tools, it’s essential to choose high-quality vinyl wrap film. Look for brands that offer durability, ease of application, and a variety of finishes such as matte, gloss, or satin. A good vinyl wrap will adhere well and withstand the elements.

2. Utility Knife

A sharp utility knife is a fundamental tool in any vinyl wrapping project. It allows you to make precise cuts and trims to ensure a clean edge. Opt for a knife that includes replaceable blades, as this will keep your cuts sharp and your work neat.

3. Squeegee

A squeegee is vital for ensuring a smooth application of vinyl. It helps remove air bubbles and creases, ensuring that the vinyl adheres properly to the surface. Look for a squeegee with a felt edge to prevent scratches on your vinyl.

4. Heat Gun

A heat gun is indispensable for stretching and conforming vinyl to curved surfaces. The heat allows the vinyl to become pliable, making it easier to apply and mold around edges. Be cautious with the heat settings to avoid damaging the vinyl.

5. Measuring Tools

Accurate measurements are key to a successful wrap. Use a tape measure and a straight edge for precise cutting. A measuring tool ensures that your vinyl is cut to the correct size, avoiding waste and ensuring a perfect fit.

6. Cleaning Supplies

Before applying vinyl, the surface must be clean and free from contaminants. Use a mixture of soap and water along with microfiber cloths to clean the surface thoroughly. Additionally, isopropyl alcohol can be used for final cleaning to ensure all residues are removed.

7. Application Fluid

Application fluid can be a lifesaver, especially for large surfaces. This fluid allows for easier repositioning of the vinyl during application. It reduces friction and helps the vinyl slide into place without sticking immediately, giving you time to adjust.

8. Gloves

Wearing gloves during the application process can prevent fingerprints and oils from your hands from getting on the vinyl, which can interfere with adhesion. Opt for latex or nitrile gloves for the best protection.

9. Vinyl Cutting Tools

If you plan on making intricate designs or shapes, consider investing in a vinyl cutter. This machine can help you create custom vinyl decals and graphics with precision, allowing for a more personalized wrap.

10. Safety Gear

Don’t forget to prioritize safety! Eye protection and a mask are important when using tools like heat guns or utility knives. Keeping yourself safe ensures that you can complete your project without injury.

11. Work Surface

Having a clean, flat work surface makes a significant difference. It allows for better control and accuracy when cutting and applying vinyl. A large table or workspace is ideal for handling larger sheets of vinyl.

Conclusion

Investing in the right vinyl wrapping tools is essential for any DIY project. With these tools at your disposal, you’ll be well-equipped to achieve a professional-quality finish on your vehicle or any other surface. Remember, practice makes perfect, and with the right tools, you can create stunning results that are both eye-catching and durable. Happy wrapping!