Mastering the Art of Heat Gun Wrapping: Tips and Techniques for a Flawless Finish

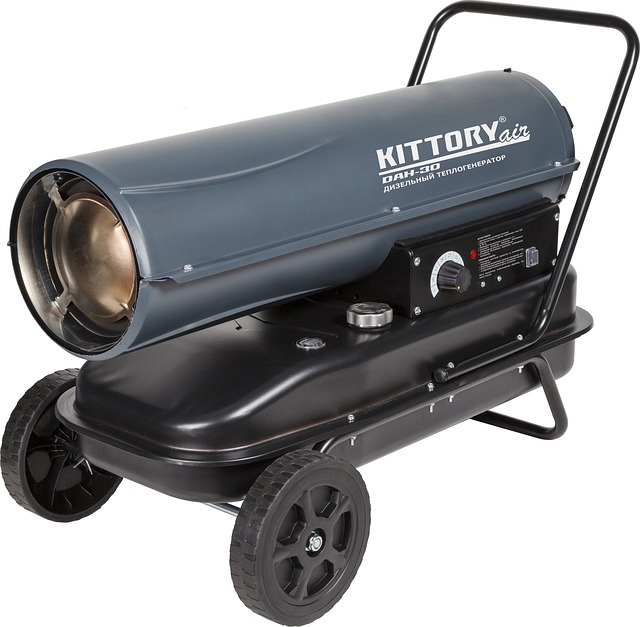
warmly, diesel, heat, heat gun, device, heating

Mastering the Art of Heat Gun Wrapping

Are you looking to take your DIY projects to the next level? The heat gun wrapping technique can help you achieve a professional finish that will impress even the most discerning eyes. Whether you’re wrapping furniture, creating custom designs, or simply adding a protective layer to an object, mastering the heat gun wrapping technique is essential for a flawless result. In this post, we’ll explore expert tips and techniques to elevate your wrapping game.

What is Heat Gun Wrapping?

Heat gun wrapping involves using a heat gun to manipulate materials such as vinyl, plastic, or film. By applying heat, you can make these materials more pliable, allowing them to conform to the shape of the object you are wrapping. This technique is widely used in automotive, furniture, and craft projects.

Essential Tools for Heat Gun Wrapping

Before diving into the wrapping process, ensure you have the right tools at your disposal. Here’s a list of essential tools:

  • Heat Gun: Invest in a good-quality heat gun that offers adjustable temperature settings.
  • Vinyl Wrap: Choose high-quality vinyl or film that suits your project.
  • Utility Knife: For precise cutting of the material.
  • Application Tools: Use tools like a squeegee or felt applicator to smooth out the material.
  • Measuring Tape: For accurate measurements of the surfaces you will be wrapping.
  • Protective Gear: Safety goggles and gloves to protect against heat and sharp tools.

Preparation: Setting the Stage for Success

Proper preparation is crucial for achieving a flawless finish. Follow these steps:

  1. Clean the Surface: Ensure that the surface you are wrapping is clean, dry, and free of any dust or debris.
  2. Measure and Cut: Accurately measure the area you want to wrap and cut the vinyl slightly larger than needed.
  3. Plan Your Design: If you’re using multiple pieces, plan how they will fit together to avoid seams.

Executing the Heat Gun Wrapping Technique

Now that you’re prepared, it’s time to execute the heat gun wrapping technique. Here are some tips to ensure a seamless application:

1. Heating the Vinyl

Begin by turning on your heat gun and setting it to a low temperature. Hold it about 6 to 12 inches away from the vinyl. Move the heat gun back and forth to avoid overheating any one spot:

  • Focus on one section at a time to prevent the vinyl from cooling before you can apply it.
  • Watch for the vinyl to become slightly glossy; this indicates it’s at the right temperature.

2. Applying the Vinyl

Carefully place the heated vinyl onto the surface. Start from one end and gradually work your way to the other:

  • Use a squeegee to press the vinyl down, pushing out any air bubbles as you go.
  • For curves and edges, use your heat gun to further soften the vinyl, allowing it to conform better to the shape.

3. Trimming Excess Material

Once the vinyl is applied and smoothed out, let it cool for a few minutes before trimming the excess:

  • Use a sharp utility knife for clean edges.
  • Be careful not to cut too deep; you want to avoid damaging the underlying surface.

4. Final Touches

After trimming, take a moment to inspect your work:

  • Check for any bubbles or imperfections and use the heat gun to fix them.
  • For a perfect finish, apply a heat seal around the edges to ensure durability.

Common Mistakes to Avoid

Even experienced DIYers can make mistakes when using the heat gun wrapping technique. Here are some common pitfalls to avoid:

  • Overheating: Too much heat can cause the vinyl to warp or bubble.
  • Ignoring Air Bubbles: Failing to remove air bubbles can lead to an uneven finish.
  • Rushing the Process: Take your time to ensure each step is executed properly.

Conclusion

Mastering the heat gun wrapping technique can transform your DIY projects, giving them a polished and professional appearance. By following these tips and techniques, you’ll be well on your way to achieving flawless finishes on all your wrapping endeavors. Remember, practice makes perfect, so don’t hesitate to experiment and refine your skills!

Unlocking the Art of Vinyl Wrapping: Essential Techniques and Tips for a Flawless Finish

arts and crafts, bows, ribbons, gift, gift wrapping, present, goft box, art materials, scissors, wrapping paper, celebration, christmas gift, christmas present, paper, gift, gift, gift, gift, gift, gift wrapping, present, scissors, wrapping paper, paper

Unlocking the Art of Vinyl Wrapping: Essential Techniques and Tips for a Flawless Finish

Vinyl wrapping has emerged as an exciting way to customize vehicles, furniture, and various surfaces, providing an opportunity for creativity while protecting the underlying material. Whether you’re a seasoned pro or a beginner, mastering vinyl wrapping techniques can make all the difference in achieving a flawless finish. In this blog post, we will explore essential techniques and tips to help you elevate your vinyl wrapping skills.

Understanding the Basics of Vinyl Wrapping

Before diving into the practical aspects, it’s important to understand what vinyl wrapping entails. Vinyl wraps are made from durable plastic materials that can be applied to surfaces to change their color, design, or texture. This technique is popular for automotive customization but is also applicable to various DIY projects.

Key Materials Needed

  • High-quality vinyl wrap: Choose a reliable brand that offers a range of colors and finishes.
  • Application tools: A squeegee, utility knife, and heat gun are essential for a smooth application.
  • Surface cleaner: Ensure that the surface is clean and free of contaminants before applying the vinyl.
  • Measuring tools: Use a tape measure and ruler to ensure accurate cutting and fitting.

Surface Preparation: The Foundation of a Great Wrap

The first step in achieving a flawless finish is proper surface preparation. Follow these steps for effective cleaning and prepping:

Step-by-Step Surface Preparation

  1. Clean the surface: Use a suitable cleaner to remove dirt, grease, and wax. Rinse thoroughly and dry.
  2. Repair any damage: Fill in scratches or dents to create a smooth surface for the wrap.
  3. Sand the surface: Lightly sand glossy surfaces to create a better bond for the vinyl.
  4. Use a primer: If necessary, apply a primer to enhance adhesion, particularly on challenging surfaces.

Essential Vinyl Wrapping Techniques

Now that your surface is prepared, it’s time to apply the vinyl. Here are some essential vinyl wrapping techniques to keep in mind:

1. Cutting the Vinyl

Accurate cutting is crucial. Use a utility knife for precise cuts, and leave extra material around the edges to ensure full coverage. Remember to cut on a flat surface to avoid damaging the underlying material.

2. Applying Heat

Using a heat gun can help the vinyl conform to the surface. Heat the vinyl slightly before applying it to allow it to stretch and mold around curves and edges. Be careful not to overheat, as this can damage the vinyl.

3. Squeegeeing for a Smooth Finish

Use a squeegee to remove air bubbles and ensure proper adhesion. Start from the center and work your way outwards to push air out towards the edges. This technique helps avoid wrinkles and ensures a tight bond.

4. Trimming and Finishing Edges

Once the vinyl is applied, carefully trim away the excess material with a utility knife. Make sure to leave a small margin to prevent peeling. Use a heat gun again to secure the edges and prevent lifting.

Creating Intricate Designs

If you want to go beyond solid colors and create intricate designs, here are some tips:

1. Use Layering Techniques

Layering different colors can create a dynamic look. Start with the base layer and allow it to adhere properly before applying additional layers on top.

2. Utilize a Template

For complex designs, creating a template can help you achieve accuracy. Cut your design out of paper to visualize placement before applying the vinyl.

3. Experiment with Textures

Vinyl comes in various finishes, such as matte, gloss, and textured. Mixing these finishes can add depth and interest to your project.

Final Thoughts

Vinyl wrapping is a rewarding process that allows for creativity and personalization. By mastering the essential vinyl wrapping techniques discussed in this post, you can ensure a flawless finish for your next project. Remember, practice makes perfect, so don’t hesitate to experiment and refine your skills. Happy wrapping!

Mastering Vinyl Wrapping Techniques: A Comprehensive Guide for Beginners

vinyl, turntable, electronics, music, music player, phonograph, phonograph record, player, record player, vintage, retro, oldtimer, nostalgia, nostalgic, vinyl, vinyl, vinyl, electronics, music, music, music, music, music, record player, record player, record player, nostalgia

Introduction to Vinyl Wrapping Techniques

Vinyl wrapping has emerged as a popular method for transforming surfaces, whether for vehicles, furniture, or various DIY projects. Mastering vinyl wrapping techniques can elevate your skills and allow you to create stunning visual effects. This comprehensive guide will walk you through essential techniques, from surface preparation to advanced application methods.

Essential Vinyl Wrapping Techniques

1. Surface Preparation

Before applying vinyl, proper surface preparation is crucial. Here’s how to ensure the best adhesion:

  • Clean the Surface: Use a degreaser or isopropyl alcohol to remove dirt, oil, and contaminants.
  • Dry the Area: Make sure the surface is completely dry before application.
  • Sand if Necessary: For rough surfaces, lightly sand to create a smoother finish.

2. Choosing the Right Vinyl

Selecting the right type of vinyl is essential for achieving the desired look and durability. Consider the following:

  • Cast vs. Calendered Vinyl: Cast vinyl is thinner and more conformable, making it ideal for complex curves. Calendered vinyl is thicker and more suited for flat surfaces.
  • Finish Options: Decide whether you want a matte, gloss, or satin finish based on your project’s aesthetic.

3. Cutting Vinyl Accurately

Accurate cutting is vital to a successful wrap. Here are some tips:

  • Use a Sharp Blade: Always use a fresh blade to ensure clean cuts.
  • Measure Twice: Take precise measurements before cutting to avoid waste.
  • Use a Cutting Mat: Protect your surfaces and ensure the blade does not damage work tables.

4. Application Techniques

Applying vinyl correctly is the heart of mastering vinyl wrapping techniques. Here are some methods to help you:

  • Dry Application: Ideal for flat surfaces, this method involves peeling the backing and applying the vinyl directly.
  • Wet Application: Use a mixture of water and a few drops of dish soap to create a sliding surface, allowing for repositioning before the vinyl adheres.
  • Heat Application: Using a heat gun can help conform the vinyl to curves and edges, making it easier to wrap contours.

5. Post-Application Techniques

Once the vinyl is applied, it’s important to finish the process correctly:

  • Trim Excess Vinyl: Use a utility knife to carefully trim any excess vinyl for a clean edge.
  • Seal the Edges: Use a heat gun to seal the edges and prevent peeling.
  • Allow to Cure: Let the vinyl sit undisturbed for 24 hours to ensure proper adhesion.

Advanced Vinyl Wrapping Techniques

1. Layering Vinyl

For unique designs, layering different colors or finishes can create eye-catching effects. Here’s how to do it:

  • Start with a Base Layer: Apply the first layer and allow it to cure.
  • Use a Translucent Layer: Overlay with a translucent vinyl for interesting color blends.

2. Creating Patterns and Graphics

Incorporating graphics or patterns can enhance your projects. Consider these steps:

  • Design Your Graphic: Use design software to create your desired pattern.
  • Print on Vinyl: Use specialized printers to print your designs onto vinyl.
  • Careful Application: Apply graphics carefully using the same methods discussed above, ensuring no air bubbles.

3. Removing Vinyl

Sometimes, you may need to remove vinyl to replace it or repair an area. Follow these steps:

  • Heat the Vinyl: Use a heat gun to loosen the adhesive.
  • Peel Away Slowly: Carefully peel the vinyl at a 45-degree angle to avoid damaging the underlying surface.
  • Clean Residue: Use adhesive remover to eliminate any leftover adhesive.

Conclusion

Mastering vinyl wrapping techniques is a rewarding skill that opens up a world of creative possibilities. With the right preparation, materials, and techniques, you can transform surfaces and bring your artistic visions to life. Whether you’re wrapping a vehicle, furniture, or embarking on a DIY project, these techniques will guide you toward success. Happy wrapping!