10 Essential Tips to Extend the Lifespan of Your Vinyl Wrapped Vehicle

vintage car, vintage automobile, classic car, car show, automobile, vehicle, classic vehicle, vintage vehicle, black and white, vintage car, vintage car, vintage car, vintage car, vintage car, car show, car show, vehicle, vehicle, vehicle

10 Essential Tips to Extend the Lifespan of Your Vinyl Wrapped Vehicle

Vinyl wraps are a popular choice for vehicle customization due to their vibrant colors and designs. However, to ensure that your wrap remains in pristine condition, it’s essential to follow certain maintenance routines. Here are 10 essential tips to extend the lifespan of your vinyl wrapped vehicle, helping you keep it looking vibrant and new for years to come.

1. Regular Washing

One of the most effective ways to make a vinyl wrapped vehicle last longer is through regular washing. Use a mild soap and a soft sponge or microfiber cloth to gently clean the surface. Avoid using high-pressure washers, as they can lift the edges of the wrap.

2. Hand Wash Over Automatic Car Washes

While automatic car washes are convenient, they often use harsh brushes and chemicals that can damage your vinyl wrap. Always opt for a hand wash to ensure that the wrap is treated with care.

3. Use the Right Cleaning Products

Make sure to use cleaning products that are specifically designed for vinyl wraps. Avoid products with ammonia or alcohol, as these can cause discoloration and degradation of the wrap material.

4. Avoid Direct Sunlight

Prolonged exposure to direct sunlight can cause the vinyl to fade and peel. Whenever possible, park your vehicle in shaded areas or use a car cover to protect it from UV rays.

5. Wax with Caution

Applying a wax or sealant can help protect your vinyl wrap. However, ensure that the product is compatible with vinyl. Look for waxes that are specifically formulated for vinyl wraps to avoid any adverse reactions.

6. Be Mindful of Temperature Changes

Extreme temperature fluctuations can adversely affect your wrap. If you live in an area with harsh winters or scorching summers, consider storing your vehicle in a garage or climate-controlled environment to reduce stress on the vinyl.

7. Avoid Sharp Objects

Be cautious around sharp objects that could scratch or puncture the vinyl. This includes avoiding brushes with stiff bristles when cleaning and being mindful of items in your vehicle that could come into contact with the wrap.

8. Repair Damages Promptly

If you notice any scratches or small tears in your vinyl wrap, address them immediately. Small damages can lead to more significant issues if left untreated. Many vinyl wraps can be repaired with patch kits or professional services.

9. Limit Exposure to Harsh Chemicals

Harsh chemicals can degrade the vinyl material. Be cautious when using products like gas, oil, or brake fluid around your vehicle. Clean any spills immediately to prevent damage.

10. Regular Inspections

Make it a habit to regularly inspect your vinyl wrap for any signs of wear or damage. Early detection can save you from costly repairs and help you maintain the aesthetic appeal of your vehicle.

Conclusion

By following these 10 essential tips to extend the lifespan of your vinyl wrapped vehicle, you can ensure that your investment remains in excellent condition. Regular maintenance, careful cleaning, and prompt repairs are key to making your vinyl wrapped vehicle last longer. With the right care, your vinyl wrap can continue to turn heads and make a statement on the road for years to come.

Transform Your Ride: The Ultimate Guide to Wrap Cars for a Stunning Makeover

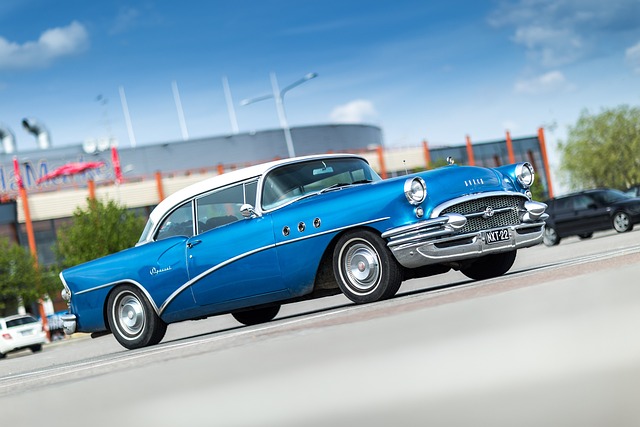
buick, oldtimer, old, car, blue car, classic, vintage, retro, nostalgia, nostalgic, old car, parked car, car body, vehicle, transportation, automobile, automotive, car, car, car wallpapers, car, car, car

Transform Your Ride: The Ultimate Guide to Wrap Cars for a Stunning Makeover

If you’re looking to give your vehicle a fresh and exciting new look, wrapping your car is a fantastic option to consider. Car wrapping has become increasingly popular among car enthusiasts and everyday drivers alike, thanks to its versatility, affordability, and protective benefits. In this guide, we’ll explore the many advantages of wrap car options, customization possibilities, and why it can be a cost-effective alternative to a full repaint.

What is Car Wrapping?

Car wrapping involves applying a large vinyl film over the exterior of a vehicle, effectively changing its appearance without the need for a permanent paint job. This process allows for a wide range of colors, textures, and designs that can be tailored to your personal style.

Benefits of Car Wrapping

  • Customization Options: One of the most significant advantages of wrapping your car is the limitless customization options available. From matte finishes to glossy sheens and even unique prints or patterns, you can truly make your vehicle stand out.
  • Protection for Your Vehicle: A high-quality vinyl wrap provides a layer of protection against UV rays, dirt, scratches, and other environmental factors that can damage your vehicle’s paint. This protective layer can help maintain your car’s resale value.
  • Cost-Effective Alternative: Compared to a full repaint, car wrapping is often more affordable. Full paint jobs can be expensive, especially for high-quality finishes. A wrap can give you a similar aesthetic change at a fraction of the cost.
  • Reversibility: If you get tired of your wrap or want to change your vehicle’s look again, vinyl wraps can be removed without damaging the underlying paint. This flexibility allows you to keep your car looking fresh without a long-term commitment.

Types of Car Wraps

When it comes to choosing a wrap for your car, there are several types to consider:

  • Full Wrap: A full wrap covers the entire vehicle, providing a complete transformation. This option is perfect for those who want a dramatic change in appearance.
  • Partial Wrap: If you’re looking for a subtler change, a partial wrap targets specific areas of the car, such as the hood, roof, or rear. This option is often more budget-friendly while still making a noticeable impact.
  • Color Change Wrap: This type of wrap is designed specifically for changing the color of your vehicle. You can select from a wide variety of colors and finishes to achieve your desired look.
  • Graphic Wrap: For businesses or individuals wanting to promote a brand or showcase personal art, graphic wraps allow for custom designs, logos, or images to be applied to the vehicle.

Choosing the Right Material

The quality of the vinyl wrap material is crucial for achieving a stunning result. Here are some factors to consider when selecting the right wrap material:

  • Durability: Look for high-quality vinyl that can withstand harsh weather conditions and UV rays. Durability ensures that your wrap lasts longer and maintains its appearance.
  • Finish: Decide if you want a matte, gloss, or satin finish. Each finish offers a different aesthetic and can significantly change the look of your vehicle.
  • Thickness: Thicker vinyl wraps tend to be more durable and easier to work with, especially for intricate designs or curves on the car’s surface.

Installation Process

While some DIY enthusiasts may attempt to wrap their cars, professional installation is highly recommended to ensure a flawless finish. Here’s a brief overview of the installation process:

  1. Preparation: The vehicle must be cleaned thoroughly to remove any dirt, wax, or grease that could interfere with adhesion.
  2. Measuring and Cutting: The vinyl is measured and cut to fit the specific dimensions of the vehicle.
  3. Application: Using heat and pressure, the vinyl is carefully applied to the car’s surface, smoothing out any bubbles or wrinkles.
  4. Finishing Touches: Edges are trimmed, and any necessary adjustments are made to ensure a clean, professional look.

Maintenance Tips for Your Wrapped Car

To keep your wrapped car looking its best, follow these maintenance tips:

  • Regular Washing: Hand wash your vehicle regularly with mild soap and a soft cloth to avoid scratching the vinyl.
  • Avoid Harsh Chemicals: Steer clear of abrasive cleaners or harsh chemicals that could damage the wrap.
  • Park in Shade: Whenever possible, park your car in shaded areas to protect the wrap from prolonged exposure to sunlight.

Conclusion

Wrapping your car is an excellent way to transform its appearance while protecting its original paint. With numerous customization options, cost-effective pricing, and the ability to revert to the original look, wrap car services are a popular choice for vehicle owners looking for a change. Whether you’re a business looking for advertising space or an individual wanting to express your style, car wraps can provide the perfect solution. Start exploring your options today and give your vehicle the stunning makeover it deserves!

Unlocking the Art of Vinyl Wrapping: Step-by-Step Techniques for a Flawless Finish

transformation, digital, visualization, digitization, gear, work, design, laptop, finger, touch, smart, transformation, transformation, transformation, transformation, transformation

Unlocking the Art of Vinyl Wrapping: Step-by-Step Techniques for a Flawless Finish

Vinyl wrapping has taken the DIY world by storm, allowing enthusiasts to transform surfaces with a professional look without the hefty price tag. Whether you’re looking to wrap your car, furniture, or gadgets, mastering vinyl wrapping techniques can lead to stunning results. In this blog post, we will explore essential techniques, step-by-step instructions, and tips to help you achieve a flawless finish at home.

Understanding Vinyl Wrapping

Vinyl wrapping involves applying a thin layer of vinyl film over a surface. This process not only provides a new color or texture but also protects the underlying material. Here are some key benefits of vinyl wrapping:

  • Cost-Effective: Less expensive than a full paint job.
  • Versatility: Can be applied to various surfaces including vehicles, furniture, and electronic devices.
  • Easy Removal: Unlike paint, vinyl can be removed without damaging the underlying surface.

Essential Tools and Materials

Before diving into the wrapping process, gather the following tools and materials:

  • High-quality vinyl wrap
  • Heat gun or hairdryer
  • Utility knife or vinyl cutter
  • Application squeegee
  • Cleaning supplies (isopropyl alcohol, microfiber cloth)
  • Measuring tape
  • Masking tape

Step-by-Step Vinyl Wrapping Techniques

Step 1: Preparing the Surface

Preparation is crucial for a successful wrap. Follow these steps:

  1. Clean the Surface: Use isopropyl alcohol and a microfiber cloth to remove any dirt, grease, or wax.
  2. Inspect for Damage: Ensure the surface is smooth and free of scratches or dents.
  3. Measure and Cut: Measure the area to be wrapped and cut the vinyl with extra material (around 2-3 inches) for margin.

Step 2: Applying the Vinyl

Now that your surface is ready, it’s time to apply the vinyl:

  1. Position the Vinyl: Lay the vinyl over the surface, using masking tape to hold it in place temporarily.
  2. Start from One Edge: Begin to peel the backing paper off from one edge while slowly applying the vinyl to the surface.
  3. Use the Squeegee: Gently press the vinyl onto the surface with the squeegee, starting from the center and moving outward to remove air bubbles.
  4. Heat for Flexibility: Use a heat gun to warm the vinyl slightly, making it more pliable. This is especially useful for curves and edges.

Step 3: Trimming and Finishing

Once the vinyl is applied, it’s time for the finishing touches:

  1. Trim Excess Vinyl: Use a utility knife to carefully cut away the excess vinyl along the edges.
  2. Seal the Edges: Use the heat gun to seal the edges of the vinyl securely, which helps prevent peeling.
  3. Final Inspection: Check for any air bubbles or imperfections. Use the squeegee to push out any trapped air.

Tips for a Flawless Finish

To enhance your vinyl wrapping skills, consider the following tips:

  • Practice on Smaller Items: Before tackling larger surfaces, practice your technique on small items like phone cases or small furniture.
  • Work in a Controlled Environment: Avoid wrapping in extreme temperatures or windy conditions, as this can affect adhesion.
  • Use Quality Materials: Invest in high-quality vinyl wrap for better durability and finish.

Conclusion

By following these vinyl wrapping techniques, you can achieve a professional-looking finish on various surfaces at home. With practice and the right tools, vinyl wrapping can become an enjoyable and rewarding DIY project. So gather your materials, prepare your surface, and start transforming your items today!