Mastering the Art of Panel Wrapping: Top Tips for a Flawless Finish
Panel wrapping is an art that combines technique, precision, and a keen eye for detail. Whether you’re a DIY enthusiast looking to spruce up your space or a professional installer aiming to enhance your skills, mastering the art of panel wrapping can yield stunning results. In this guide, we’ll explore essential techniques and panel wrapping tips to ensure a flawless finish that stands the test of time.
Understanding the Basics of Panel Wrapping
Before diving into the techniques, it’s crucial to understand what panel wrapping is. Essentially, it involves applying a vinyl film or adhesive material to a panel’s surface to achieve a desired aesthetic or protective finish. This process is commonly used in automotive, furniture, and interior design.
Essential Tools for Panel Wrapping
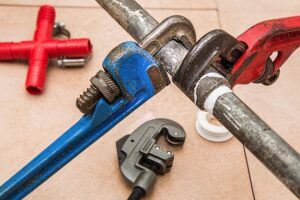
To achieve the best results in your panel wrapping project, having the right tools is essential. Here’s a list of the necessary tools:
- Heat Gun: Useful for stretching and conforming the vinyl to curves and edges.
- Utility Knife: For precise cutting of the vinyl material.
- Squeegee: Essential for applying the vinyl smoothly and removing air bubbles.
- Measuring Tape: To ensure accurate measurements before cutting materials.
- Cleaning Supplies: Including isopropyl alcohol and microfiber cloths to prep the surface.
Step-by-Step Guide to Panel Wrapping
1. Prepare Your Surface
Before applying any vinyl, ensure the surface is clean, dry, and free from dust and grease. Use isopropyl alcohol and a microfiber cloth to wipe down the area thoroughly.
2. Measure and Cut the Vinyl
Measure the panel accurately and cut the vinyl, leaving a little excess around the edges to allow for adjustments. Remember, you can always trim more, but you can’t add back once it’s been cut.
3. Apply the Vinyl
Start by peeling back a small section of the vinyl backing. Align it carefully with the panel, and slowly press it down using a squeegee to avoid air bubbles. Work from the center outwards for the best results.
4. Use Heat for Curved Areas
For edges and curves, use a heat gun to warm the vinyl, making it more pliable. This will allow you to stretch it and conform to the shape of the panel without causing damage.
5. Trim the Excess
Once the vinyl is applied, carefully trim the excess with a utility knife. Be cautious not to cut into the panel surface underneath.
6. Finishing Touches
After trimming, go over the edges with the heat gun again to ensure a strong bond. Finally, check for any air bubbles and use the squeegee to push them out towards the edges.
Common Mistakes to Avoid
Even seasoned installers can make mistakes. Here are some common pitfalls and how to avoid them:
- Not Cleaning the Surface Properly: Ensure no dust or oil is present to avoid adhesion issues.
- Using the Wrong Temperature: Too much heat can damage the vinyl, while too little can prevent it from conforming properly.
- Rushing the Application: Take your time to avoid mistakes; rushing can lead to bubbles and misalignment.
Maintenance Tips for Longevity
Once your panels are wrapped, maintaining their appearance is crucial. Here are some maintenance tips:
- Avoid Harsh Chemicals: Clean the surface with mild soap and water instead.
- Regular Inspections: Check for any lifting edges or bubbles and address them promptly.
- Keep It Dry: Ensure the wrapped panels do not stay wet for long periods to avoid moisture damage.
Conclusion
Panel wrapping can transform the look of any surface while providing a layer of protection. By following these panel wrapping tips, you can achieve a professional-looking finish whether you’re working on a small DIY project or a larger professional installation. With practice and attention to detail, you’ll be mastering the art of panel wrapping in no time!


