Gloss Wrap Finish: Transform Your Vehicle’s Look with a Mirror Shine

lipstick, lipgloss, lip gloss, lips, red, woman, young, girl, lady, female, makeup, make-up, closeup, brown hair, hair, brown, little mirror, mirror, beauty, lipstick, lipstick, lipstick, lipstick, makeup, makeup, makeup, makeup, makeup, mirror, mirror

What is a Gloss Wrap Finish?

A gloss wrap finish is a type of vehicle wrap that features a high-gloss surface, providing a sleek, mirror-like shine. This finish not only enhances the aesthetic appeal of your vehicle but also offers a layer of protection against environmental elements. Whether you’re looking to transform your car’s appearance or simply want to protect its original paint, a gloss wrap could be an ideal solution.

Benefits of a Gloss Wrap Finish

1. Enhanced Aesthetic Appeal

The most noticeable advantage of a gloss wrap finish is its stunning appearance. The mirror-like shine can make your vehicle stand out, giving it a fresh, modern look. Here are some aesthetic benefits:

  • Creates a vibrant, eye-catching finish.
  • Available in various colors and styles for personalization.
  • Can give an older vehicle a new lease on life.

2. Protection for Your Vehicle

A gloss wrap finish provides a protective layer that shields your vehicle’s original paint from scratches, UV rays, and other damaging elements. Consider the following protective benefits:

  • Prevents fading and oxidation from sun exposure.
  • Resists minor abrasions and chips.
  • Easy to clean and maintain compared to traditional paint.

3. Cost-Effective Customization

Customizing your vehicle can often be an expensive endeavor, especially if it involves a full paint job. A gloss wrap finish offers a more affordable alternative:

  • Less expensive than a high-quality paint job.
  • Can be removed or changed without damaging the original paint.
  • Allows for temporary designs or colors for special events or promotions.

4. Easy Installation and Removal

Gloss wraps are designed to be applied over your vehicle’s existing paint, making installation straightforward. Additionally, they can be removed without damaging the underlying surface:

Choosing the Right Gloss Wrap Finish

When considering a gloss wrap finish, it’s essential to choose the right material and color. Here are some tips to help you make the best decision:

1. Select High-Quality Vinyl

Invest in a high-quality vinyl wrap to ensure longevity and durability. Look for brands that are known for their reliability and warranty options.

2. Consider the Color

Your vehicle’s color can dramatically change its look. Opt for a color that complements your vehicle’s design and fits your personal style. Matte and metallic options are also available for those looking for something unique.

3. Professional Installation

While DIY options are available, professional installation is recommended for the best results. Experts will ensure that the wrap is applied smoothly, without bubbles or wrinkles, giving you a flawless finish.

Maintenance Tips for Your Gloss Wrap Finish

To keep your gloss wrap looking its best, follow these maintenance tips:

  • Wash your vehicle regularly using a gentle soap and soft sponge.
  • Avoid using abrasive materials that could scratch the wrap.
  • Park in shaded areas or use a car cover to protect from UV exposure.
  • Address any scratches or damage promptly to maintain the wrap’s integrity.

Conclusion

A gloss wrap finish is an excellent way to enhance your vehicle’s appearance while providing protection and customization options. Whether you’re a car enthusiast looking to personalize your ride or simply want to preserve the beauty of your vehicle, a gloss wrap offers a cost-effective, stylish solution. With the right choice of colors, materials, and professional installation, you can achieve a stunning look that will turn heads on the road.

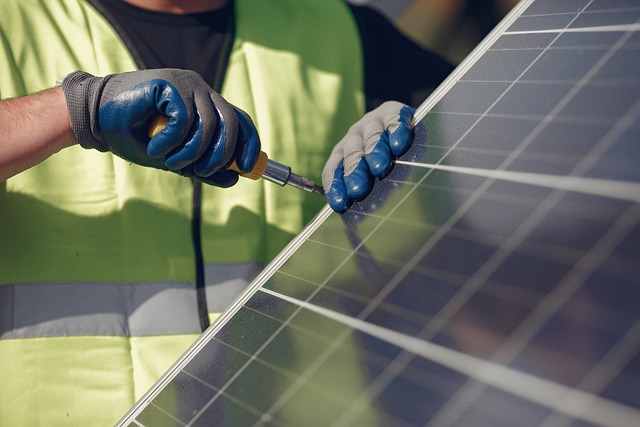
Mastering the Art of Panel Wrapping: Top Tips for a Flawless Finish

solar panel, installation, worker, solar energy, man, installer, installing, panel, power, electricity, renewable, rooftop, male, generator, photovoltaic, cell, grid, electric, solar panel, solar panel, solar panel, solar panel, solar panel

Mastering the Art of Panel Wrapping: Top Tips for a Flawless Finish

Panel wrapping is an art that combines technique, precision, and a keen eye for detail. Whether you’re a DIY enthusiast looking to spruce up your space or a professional installer aiming to enhance your skills, mastering the art of panel wrapping can yield stunning results. In this guide, we’ll explore essential techniques and panel wrapping tips to ensure a flawless finish that stands the test of time.

Understanding the Basics of Panel Wrapping

Before diving into the techniques, it’s crucial to understand what panel wrapping is. Essentially, it involves applying a vinyl film or adhesive material to a panel’s surface to achieve a desired aesthetic or protective finish. This process is commonly used in automotive, furniture, and interior design.

Essential Tools for Panel Wrapping

To achieve the best results in your panel wrapping project, having the right tools is essential. Here’s a list of the necessary tools:

  • Heat Gun: Useful for stretching and conforming the vinyl to curves and edges.
  • Utility Knife: For precise cutting of the vinyl material.
  • Squeegee: Essential for applying the vinyl smoothly and removing air bubbles.
  • Measuring Tape: To ensure accurate measurements before cutting materials.
  • Cleaning Supplies: Including isopropyl alcohol and microfiber cloths to prep the surface.

Step-by-Step Guide to Panel Wrapping

1. Prepare Your Surface

Before applying any vinyl, ensure the surface is clean, dry, and free from dust and grease. Use isopropyl alcohol and a microfiber cloth to wipe down the area thoroughly.

2. Measure and Cut the Vinyl

Measure the panel accurately and cut the vinyl, leaving a little excess around the edges to allow for adjustments. Remember, you can always trim more, but you can’t add back once it’s been cut.

3. Apply the Vinyl

Start by peeling back a small section of the vinyl backing. Align it carefully with the panel, and slowly press it down using a squeegee to avoid air bubbles. Work from the center outwards for the best results.

4. Use Heat for Curved Areas

For edges and curves, use a heat gun to warm the vinyl, making it more pliable. This will allow you to stretch it and conform to the shape of the panel without causing damage.

5. Trim the Excess

Once the vinyl is applied, carefully trim the excess with a utility knife. Be cautious not to cut into the panel surface underneath.

6. Finishing Touches

After trimming, go over the edges with the heat gun again to ensure a strong bond. Finally, check for any air bubbles and use the squeegee to push them out towards the edges.

Common Mistakes to Avoid

Even seasoned installers can make mistakes. Here are some common pitfalls and how to avoid them:

  • Not Cleaning the Surface Properly: Ensure no dust or oil is present to avoid adhesion issues.
  • Using the Wrong Temperature: Too much heat can damage the vinyl, while too little can prevent it from conforming properly.
  • Rushing the Application: Take your time to avoid mistakes; rushing can lead to bubbles and misalignment.

Maintenance Tips for Longevity

Once your panels are wrapped, maintaining their appearance is crucial. Here are some maintenance tips:

  • Avoid Harsh Chemicals: Clean the surface with mild soap and water instead.
  • Regular Inspections: Check for any lifting edges or bubbles and address them promptly.
  • Keep It Dry: Ensure the wrapped panels do not stay wet for long periods to avoid moisture damage.

Conclusion

Panel wrapping can transform the look of any surface while providing a layer of protection. By following these panel wrapping tips, you can achieve a professional-looking finish whether you’re working on a small DIY project or a larger professional installation. With practice and attention to detail, you’ll be mastering the art of panel wrapping in no time!

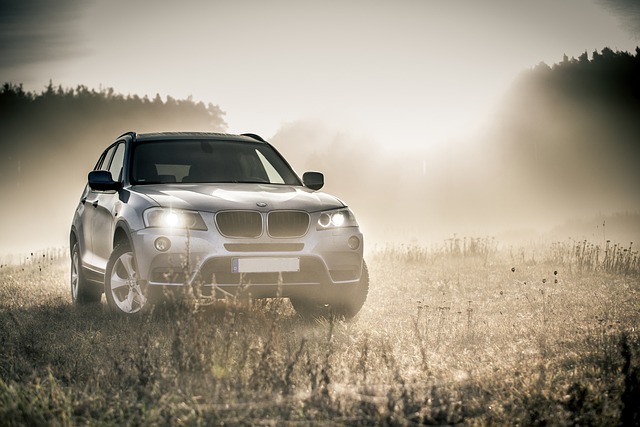
Transforming Your SUV: The Ultimate Guide to Car Wraps

bmw, suv, auto, fog, autumn, headlights, shiny car, car, vehicle, transportation, parked car, automobile, car wallpapers, automotive

Transforming Your SUV: The Ultimate Guide to Car Wraps

Are you looking to give your SUV a fresh, new look? A SUV car wrap might be just what you need! Not only do these wraps enhance the aesthetic appeal of your vehicle, but they also offer protection for the original paint. In this guide, we will explore the benefits of car wraps, how they work, and what you need to consider before transforming your SUV.

What is a Car Wrap?

A car wrap is a large vinyl graphic or decal applied directly over your vehicle’s paint. This process can change the color, add designs, or even create a unique texture. Car wraps are available in a variety of finishes, including matte, gloss, and satin, allowing for endless customization options.

Benefits of SUV Car Wraps

  • Aesthetic Appeal: One of the primary reasons people choose to wrap their SUVs is for style. A car wrap can transform a plain vehicle into a head-turner.
  • Protection: Car wraps serve as a protective layer against UV rays, scratches, and minor abrasions, shielding your original paint from damage.
  • Cost-Effective: Compared to a complete paint job, a car wrap is often more affordable and can be removed without damaging the underlying paint.
  • Customization: With a wide range of colors and designs available, you can create a unique look that reflects your personality.
  • Resale Value: Maintaining your car’s original paint with a wrap can enhance its resale value, as the paint remains intact underneath.

How Car Wraps Work

Applying a car wrap involves several steps, typically executed by professionals to ensure quality and durability. Here’s a brief overview of the process:

  1. Preparation: The surface of your SUV must be thoroughly cleaned and prepped. This step is crucial to ensure adhesion.
  2. Design: Choose a design or color for your wrap. Many companies offer custom design services to help you create a unique look.
  3. Application: The wrap is carefully applied to the vehicle, ensuring there are no bubbles or wrinkles. This requires precision and skill to get a smooth finish.
  4. Finishing Touches: After the wrap is applied, any necessary trimming and finishing touches are made to ensure a seamless look.

Choosing the Right SUV Car Wrap

When selecting a car wrap for your SUV, consider the following factors:

  • Material Quality: Choose high-quality vinyl wraps designed to withstand the elements and maintain their appearance over time.
  • Finish Options: Decide on the finish that best suits your style—matte, gloss, satin, or textured.
  • Design Flexibility: Look for a provider that offers a wide range of design and color options, including custom graphics.
  • Installation Expertise: Ensure that you work with professionals who have experience in applying car wraps to SUVs for the best results.

Maintenance of Car Wraps

To keep your SUV car wrap looking its best, follow these maintenance tips:

  • Regular Washing: Hand wash your SUV with a mild soap and soft cloth. Avoid automatic car washes with brushes that can damage the wrap.
  • Avoid Harsh Chemicals: Steer clear of abrasive cleaners and solvents that can degrade the wrap material.
  • Protect from Extreme Heat: Whenever possible, park in the shade or use a car cover to protect the wrap from prolonged sun exposure.
  • Inspect Regularly: Check for any lifting edges or damage, and address issues promptly to prolong the life of your wrap.

Conclusion

Transforming your SUV with a SUV car wrap is an excellent way to enhance its appearance while protecting its original paint job. With a variety of colors, designs, and finishes available, you can create a personalized look that stands out on the road. By choosing high-quality materials and professional installation, along with proper maintenance, your car wrap can last for years, providing both beauty and protection. Ready to take the plunge? Start exploring your options today and give your SUV the makeover it deserves!

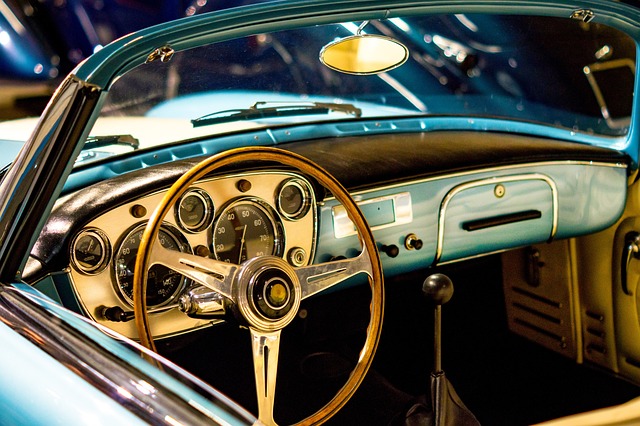
Revamp Your Ride: The Ultimate Guide to Car Wrap Installation

car, vehicle, motor, transport, car wallpapers, dashboard, maserati, oldtimer, old car, cabriolet, classic, sports car

Revamp Your Ride: The Ultimate Guide to Car Wrap Installation

If you’re looking to give your vehicle a fresh look without the commitment of a new paint job, car wrap installation might be the perfect solution. Car wraps offer a range of benefits, from aesthetic upgrades to protection for your original paint. In this guide, we’ll delve into the art and science of car wrap installation, sharing expert tips to ensure a flawless finish that transforms your vehicle’s appearance.

What is Car Wrap Installation?

Car wrap installation involves applying a large vinyl graphic or decal to the exterior of a vehicle. This process not only enhances the vehicle’s look but also protects the paint underneath from UV rays, scratches, and other potential damage. Car wraps can be used for advertising, personal expression, or simply to give your car a unique flair.

Benefits of Car Wraps

  • Cost-Effective: Compared to a full paint job, car wraps are generally more affordable and can be easily removed or replaced.
  • Variety of Designs: With countless colors, textures, and finishes available, you can achieve the exact look you desire.
  • Protective Layer: Car wraps act as a shield against the elements, helping to preserve your vehicle’s original paint.
  • Quick Installation: Professional installation can often be completed in a few days, allowing you to get back on the road quickly.

Preparing for Car Wrap Installation

Preparation is key to a successful car wrap installation. Here are the steps to follow:

  1. Choose the Right Material: Vinyl wraps come in various types, including cast and calendared vinyl. Cast vinyl is more durable and better for intricate designs, while calendared vinyl is suitable for flat surfaces.
  2. Clean Your Vehicle: Thoroughly wash and dry your car to remove dirt, grease, and wax. A clean surface ensures better adhesion of the wrap.
  3. Inspect for Damage: Check for any scratches, dents, or rust that may need to be repaired before installation. Wrapping over damaged areas can lead to issues down the line.

Tools Needed for Installation

Having the right tools is essential for a successful car wrap installation. Here’s a list of what you’ll need:

  • Vinyl wrap material
  • Heat gun
  • Utility knife
  • Application squeegee
  • Measuring tape
  • Cleaning supplies (isopropyl alcohol, microfiber cloths)

Steps for Car Wrap Installation

Once you’re prepared, follow these steps for a smooth installation:

  1. Measure and Cut: Measure the areas you plan to wrap and cut the vinyl accordingly, leaving extra material for adjustments.
  2. Apply the Wrap: Start from one end of the panel and slowly lay the wrap down, using the squeegee to remove air bubbles as you go.
  3. Heat to Stretch: Use a heat gun to gently warm the vinyl, making it pliable for curves and contours. Be careful not to overheat, as this can damage the material.
  4. Trim Excess Vinyl: Once the wrap is secured, use a utility knife to trim any excess material along the edges for a clean finish.
  5. Final Inspection: Check for any bubbles or imperfections and use the heat gun to correct them if necessary.

Maintenance Tips Post-Installation

To ensure your car wrap lasts as long as possible, follow these maintenance tips:

  • Avoid Automatic Car Washes: Hand wash your vehicle with a mild soap and avoid abrasive materials.
  • Limit Exposure to Extreme Conditions: Whenever possible, park in shaded areas to protect the wrap from UV damage.
  • Regular Inspections: Check for any lifting edges or damage and address issues promptly.

Conclusion

Car wrap installation is a fantastic way to enhance the appearance of your vehicle while providing a layer of protection to the original paint. By following the steps and tips outlined in this guide, you can achieve a professional-looking wrap that reflects your personality and style. Whether you’re looking to promote your business or just want to stand out on the road, a well-executed car wrap can make all the difference.

Transform Your Ride: The Ultimate Guide to Truck Vinyl Wraps

loader, gravel, digger, excavator, heavy, heavy equipment, industrial, large, machine, machinery, silos, technology, truck, vehicle, work, heavy machinery, gravel, heavy equipment, industrial, industrial, truck, truck, truck, truck, truck

Transform Your Ride: The Ultimate Guide to Truck Vinyl Wraps

If you’re looking to enhance the aesthetics of your truck while also protecting its original paint and boosting brand visibility, look no further than truck vinyl wraps. These versatile and affordable solutions offer a myriad of design possibilities that allow you to personalize your vehicle to your liking. In this ultimate guide, we’ll explore the benefits, process, and tips for choosing the perfect vinyl wrap for your truck.

What is a Truck Vinyl Wrap?

A truck vinyl wrap is a large sheet of vinyl film that is applied to the surface of a truck, effectively changing its color and appearance. It can cover the entire vehicle or specific parts, depending on the desired outcome. Vinyl wraps are available in various finishes, including matte, gloss, satin, and textured options, giving truck owners the freedom to express their style.

Benefits of Truck Vinyl Wraps

  • Enhances Aesthetics: With endless design possibilities, truck vinyl wraps can make your vehicle stand out. Whether you want a sleek, modern look or a bold, eye-catching design, there’s a vinyl wrap for everyone.
  • Protects Original Paint: Vinyl wraps act as a protective layer against UV rays, scratches, and minor abrasions, helping to preserve the original paint underneath.
  • Boosts Brand Visibility: For businesses, truck vinyl wraps provide an excellent opportunity for advertising. A well-designed wrap can turn your truck into a mobile billboard, increasing brand recognition wherever you go.
  • Easy to Remove: Unlike a permanent paint job, vinyl wraps can be easily removed without damaging the paint underneath, allowing for flexibility in design changes.
  • Cost-Effective: Compared to a full repaint, vinyl wraps are generally more affordable and can be installed more quickly, providing a cost-effective solution for enhancing your truck.

The Vinyl Wrap Process

The process of applying a truck vinyl wrap involves several steps to ensure a professional finish:

  1. Preparation: The truck’s surface must be thoroughly cleaned and prepped. This involves washing, polishing, and potentially repairing any scratches or dents.
  2. Design: Work with a designer to create a custom wrap that fits your vision. Many companies offer templates and design tools to help visualize the final product.
  3. Printing: Once the design is finalized, the vinyl is printed using high-quality inks that resist fading and weathering.
  4. Application: Skilled technicians will apply the vinyl wrap, ensuring it adheres smoothly and without bubbles or wrinkles. This step is crucial for achieving a seamless look.
  5. Finishing Touches: After application, the edges are trimmed, and any necessary adjustments are made to ensure a perfect fit.

Choosing the Right Vinyl Wrap

When selecting a truck vinyl wrap, consider the following factors:

  • Material Quality: Opt for high-quality vinyl that is durable and weather-resistant. Premium materials often come with warranties that protect your investment.
  • Finish: Decide on the finish that best suits your style—glossy, matte, satin, or textured. Each finish has its own unique look and feel.
  • Color and Design: Choose a color that reflects your personality or brand. Custom designs can also include logos, graphics, or patterns, allowing you to create a unique look.
  • Professional Installation: While DIY options are available, hiring professionals ensures better results and longevity of the wrap.

Maintenance of Your Truck Vinyl Wrap

To keep your truck vinyl wrap looking fresh and new, follow these maintenance tips:

  • Regular Washing: Hand wash your truck with mild soap and water to prevent dirt and grime buildup. Avoid automatic car washes with brushes that can scratch the vinyl.
  • Waxing: Use a non-abrasive wax specifically designed for vinyl to protect the wrap and enhance its shine.
  • Avoid Harsh Chemicals: Steer clear of solvents or cleaners that can damage the vinyl. Always check the label for compatibility.
  • Park Wisely: Whenever possible, park in shaded or covered areas to protect your wrap from prolonged sun exposure.

Conclusion

Truck vinyl wraps are an incredible way to transform your ride, offering both aesthetic enhancements and practical benefits. Whether you’re looking to protect your truck’s paint, promote your business, or simply make a statement, a truck vinyl wrap can do it all. With the right design and professional installation, your truck can become a true reflection of your personality and style.

Transform Your Vehicle: A Complete Guide to Car Wrap Installation

tail light, car, vehicle, tail lamp, rear, car light, light, auto, car wallpapers, automobile, automotive, urban, street, closeup

Transform Your Vehicle: A Complete Guide to Car Wrap Installation

Are you looking to give your vehicle a fresh, new look without the commitment of a permanent paint job? Car wrap installation is an innovative solution that not only enhances the appearance of your vehicle but also protects its original paint. In this guide, we’ll explore the art and precision behind car wrap installation, the benefits it offers, and how you can achieve stunning results.

What is Car Wrapping?

Car wrapping refers to the process of applying a vinyl film over the surface of a vehicle. This film comes in a myriad of colors, finishes, and textures, allowing for complete customization. Whether you want a matte finish, gloss look, or even a metallic vibe, car wraps can accommodate all styles.

Benefits of Car Wrap Installation

  • Protective Layer: A car wrap acts as a barrier against scratches, UV rays, and environmental contaminants, preserving your vehicle’s paint underneath.
  • Customizability: With countless colors and finishes available, you can create a unique look that reflects your personal style.
  • Cost-effective: Compared to a full paint job, car wrapping is usually more affordable and can be easily removed or replaced.
  • Resale Value: A well-maintained wrap can keep your car’s paint in excellent condition, thus maintaining its resale value.

Preparing for Car Wrap Installation

Before diving into the installation process, it’s crucial to prepare your vehicle properly. Here’s how to get ready:

  • Thorough Cleaning: Wash your car to remove dirt, grease, and wax. A clean surface is essential for proper adhesion of the wrap.
  • Surface Inspection: Check for any existing scratches, dents, or rust. Address any issues beforehand since they can affect the wrap’s appearance.
  • Drying: Ensure the car is completely dry before applying the wrap to prevent moisture from getting trapped under the vinyl.

Tools Required for Car Wrap Installation

Having the right tools is essential for a successful car wrap installation. Here’s a list of tools you might need:

  • Vinyl wrap film
  • Heat gun or hair dryer
  • Application squeegee
  • Utility knife
  • Measuring tape
  • Gloves
  • Cleaning supplies (soap, water, microfiber cloths)

Step-by-Step Car Wrap Installation Process

Now that you’re prepared, let’s walk through the car wrap installation process step by step:

1. Measure and Cut the Vinyl

Start by measuring the surfaces you plan to wrap. Cut the vinyl film to size, leaving extra material for adjustments.

2. Position the Wrap

Carefully lay the vinyl over the area, ensuring it’s positioned correctly. Use masking tape to hold it in place temporarily.

3. Heat the Vinyl

Using a heat gun or hair dryer, gently warm the vinyl. This makes the material more pliable and easier to work with.

4. Apply the Wrap

Using the application squeegee, press the vinyl down, starting from the center and moving outward to eliminate air bubbles. Work slowly and methodically to ensure an even application.

5. Trim Excess Vinyl

Once the wrap is in place, use a utility knife to trim the excess vinyl around edges, seams, and openings.

6. Final Touches

After the wrap is applied, go over the entire surface with the heat gun to ensure proper adhesion. Check for any air bubbles and use the squeegee to smooth them out.

Maintenance Tips for Your Car Wrap

To keep your vehicle looking its best after car wrap installation, follow these maintenance tips:

  • Regular Cleaning: Wash your car regularly to remove dirt and contaminants. Use a mild soap and avoid abrasive materials.
  • Avoid Automatic Car Washes: Hand washing is preferred, as automatic washes can damage the wrap.
  • Protect from Extended Sun Exposure: Whenever possible, park in shaded areas or use a car cover to protect the wrap from UV rays.

Conclusion

Car wrap installation is an excellent way to transform your vehicle’s appearance while providing added protection to its paint. With the right tools and techniques, you can achieve a professional-looking finish that stands out on the road. Whether you want a bold statement or a subtle refresh, car wrapping offers endless possibilities for customization.

Master the Art of DIY Car Wrapping: Tips and Tricks for a Flawless Finish

bubble wrap, bubble, wrap, transparent, packaging, material, protection, air, insulation, package, protect, delivery, parcel, textured, wrapping, bubblewrap, soft, fragile, packing, cushion, plastic, gray bubbles, bubble wrap, bubble wrap, bubble wrap, bubble wrap, bubble wrap, bubblewrap, bubblewrap

Master the Art of DIY Car Wrapping

Wrapping your car can be a fun and rewarding project that transforms your vehicle’s appearance. However, achieving a professional look requires some knowledge and skill. In this guide, we’ll share essential DIY car wrapping tips to help you wrap your car like a pro.

Choosing the Right Materials

The first step in achieving a flawless finish is selecting the right materials. Here are some key factors to consider:

  • Vinyl Wrap: Opt for high-quality cast vinyl, which is more durable and easier to work with than calendared vinyl. Brands like 3M, Avery Dennison, and Oracal offer excellent options.
  • Application Tools: Invest in a squeegee, utility knife, heat gun, and a measuring tape. These tools are essential for a smooth application and precise cuts.
  • Surface Cleaner: Use a surface cleaner or rubbing alcohol to remove any dirt, wax, or grease from your car’s surface before wrapping.

Preparing Your Vehicle

Preparation is key to a successful wrap job. Follow these steps to ensure your vehicle is ready:

  • Wash Your Car: Start by thoroughly washing your car to remove any contaminants. Pay extra attention to the areas that will be wrapped.
  • Dry Completely: After washing, dry your vehicle completely to prevent water from getting trapped under the wrap.
  • Remove Obstructions: Take off any trim, badges, or parts that can be removed easily to ensure a seamless application.
  • Inspect for Damage: Check for scratches or dents that may affect the wrap’s appearance. Repair any damage before proceeding.

Applying the Wrap Smoothly

Now that your vehicle is prepped and you have the right materials, it’s time to apply the wrap. Here are some tips for a smooth application:

  • Work in Sections: Start with one section at a time. This helps you focus and reduces the risk of errors.
  • Use Heat: Apply heat with a heat gun to make the vinyl more pliable, especially around curves and edges. Be careful not to overheat, as this can damage the vinyl.
  • Stretch Carefully: When applying the wrap, stretch it gently to avoid bubbles and wrinkles. Use the squeegee to push out air as you go.
  • Trim Excess Vinyl: Once you’ve applied the wrap, use a utility knife to trim any excess vinyl carefully. Always cut away from the car’s surface to avoid scratches.
  • Seal the Edges: Use heat to seal the edges of the wrap for a more durable finish and to prevent peeling.

Post-Application Care

After you’ve completed your wrap, proper care is essential for maintaining its appearance:

  • Avoid Washing: Refrain from washing your car for at least 48 hours to allow the wrap to adhere fully.
  • Hand Wash Only: When washing your wrapped car, opt for a hand wash with gentle soap. Avoid automatic car washes, as they can damage the wrap.
  • Use a Protectant: Consider applying a vinyl protectant to enhance the wrap’s longevity and shine.

Common Mistakes to Avoid

To achieve a professional look, avoid these common mistakes:

  • Skipping Preparation: Never underestimate the importance of prepping your vehicle. A clean surface is vital for a successful wrap.
  • Using Low-Quality Vinyl: Cheap vinyl can lead to premature fading and peeling. Always choose high-quality materials.
  • Rushing the Process: Take your time during application. Rushing can lead to mistakes and a less-than-perfect finish.

Final Thoughts

DIY car wrapping is an art that requires practice and patience. By following these DIY car wrapping tips and taking your time with the process, you can achieve a stunning and professional-looking finish for your vehicle. Whether you want to change your car’s color, add graphics, or protect the original paint, a well-executed wrap can transform your ride. Happy wrapping!

Transform Your Ride: The Ultimate Guide to Color Change Wraps

wrap, food, dish, cuisine, tortilla, vegetables, feta cheese, cheese, tomato, paprika, meal, snack, dinner, lunch, healthy, nutrition, vegetarian, tasty, delicious, closeup, food photography, wrap, wrap, wrap, tortilla, tortilla, tortilla, tortilla, tortilla

Transform Your Ride: The Ultimate Guide to Color Change Wraps

If you’re looking to give your vehicle a stunning new look without the commitment of a traditional paint job, color change wraps are the perfect solution. These innovative wraps provide not only a fresh appearance but also protect your car’s original paint. In this guide, we’ll explore the benefits of color change wraps, how to choose the right one, and the installation process.

What is a Color Change Wrap?

A color change wrap is a vinyl material that is applied over the exterior of your vehicle. It comes in a variety of colors and finishes, allowing you to customize your ride to match your style. Unlike traditional paint, wraps can be removed without damaging the underlying paint, making them a flexible and reversible option for car enthusiasts.

Benefits of Color Change Wraps

1. Stunning Aesthetic Options

Color change wraps offer a vast array of colors, textures, and finishes, including matte, gloss, satin, and even metallic options. You can easily achieve a unique look that stands out on the road.

2. Paint Protection

In addition to transforming your vehicle’s appearance, wraps act as a protective layer against scratches, UV rays, and environmental contaminants. This protection helps maintain the original paint job underneath, ensuring your car looks great for years to come.

3. Cost-Effective Alternative

Compared to a full paint job, color change wraps are often more affordable. The installation process can be quicker and less labor-intensive, saving you time and money while still providing a high-quality finish.

4. Easy Removal and Change

If you tire of the look, a wrap can be removed without damaging the paint underneath. This means you can change your vehicle’s appearance as often as you like, without the hassle of repainting.

Choosing the Right Color Change Wrap

With so many options available, selecting the perfect wrap for your vehicle can be overwhelming. Here are some tips to help you choose:

  • Consider Your Style: Think about the look you want to achieve. Do you prefer bold colors, subtle shades, or something unique like a color-shifting wrap?
  • Research Quality: Look for high-quality vinyl wraps from reputable brands. Cheaper options may not last as long or may not adhere properly.
  • Finish Matters: Decide on the finish you want, whether it’s glossy, matte, or textured. Each finish offers a different aesthetic and feel.
  • Consult Professionals: If you’re unsure, consult with a professional wrap installer. They can provide advice based on their experience and help you make the best choice.

Installation Process

While some may attempt a DIY approach, professional installation is recommended for the best results. Here’s a general overview of the installation process:

1. Preparation

The vehicle must be thoroughly cleaned and dried. Any dirt or contaminants can affect the adhesion of the wrap.

2. Measuring and Cutting

The wrap is then carefully measured and cut to fit the specific sections of the vehicle. Precision is key to ensuring a seamless look.

3. Application

The wrap is applied using heat and pressure to conform to the vehicle’s contours. This step requires skill and experience to avoid bubbles and wrinkles.

4. Finishing Touches

Once applied, the edges are carefully trimmed, and any seams are smoothed out. A professional installer will ensure that the wrap is secure and looks flawless.

Maintaining Your Color Change Wrap

To ensure the longevity of your wrap, proper maintenance is essential:

  • Regular Washing: Hand wash your vehicle with a mild soap and soft cloth to avoid damaging the wrap.
  • Avoid Harsh Chemicals: Stay away from abrasive cleaners and solvents that could harm the vinyl.
  • Park Smart: Whenever possible, park in shaded areas to reduce sun exposure and prevent fading.

Conclusion

Color change wraps are an exciting way to transform your vehicle’s appearance while offering protection and customization. With the right choice of wrap, professional installation, and proper care, you can enjoy a fresh, unique look that turns heads on the road. Whether you’re looking to make a statement or simply refresh your ride, consider investing in a color change wrap for the ultimate vehicle transformation.

Elevate Your Vehicle’s Style and Protection with Satin Vinyl Wraps

custom car, sports, automobile, wheel, unique, custom car, custom car, custom car, custom car, custom car, unique, unique, unique, unique, unique

Elevate Your Vehicle’s Style and Protection with Satin Vinyl Wraps

When it comes to personalizing your vehicle, the options can be overwhelming. However, if you’re looking to achieve a unique look while also protecting your car’s original paint, satin vinyl wrap is an excellent choice. In this post, we’ll explore the aesthetic and protective benefits of satin vinyl wraps, and guide you on how to select the perfect finish to enhance your car’s appearance.

What is Satin Vinyl Wrap?

Satin vinyl wraps are a type of adhesive film that can be applied to the exterior of a vehicle. Unlike traditional paint, vinyl wraps come in various finishes, including glossy, matte, and satin. The satin finish offers a soft sheen that enhances the vehicle’s style without being overly glossy. This unique finish strikes a balance, providing an elegant look that can turn heads.

Benefits of Satin Vinyl Wraps

Aesthetic Appeal

  • Unique Finish: The satin finish provides a sophisticated appearance, setting your vehicle apart from the crowd.
  • Color Variety: Satin vinyl wraps are available in a plethora of colors and patterns, allowing for complete customization.
  • Transformative Effect: A vinyl wrap can completely change the look of your vehicle, giving it a fresh and modern vibe.

Protection for Your Vehicle

  • Paint Preservation: Satin vinyl wraps act as a protective layer against scratches, UV rays, and environmental contaminants, preserving your car’s original paint.
  • Easy Maintenance: Vinyl wraps are easier to clean and maintain than traditional paint finishes, helping to keep your vehicle looking new.
  • Damage Reduction: The wrap can absorb minor impacts that would otherwise damage the paint underneath, reducing repair costs.

Cost-Effective Solution

Compared to a full paint job, applying a satin vinyl wrap is often more cost-effective. Not only is the initial investment lower, but it can also save you money in the long run by protecting the underlying paintwork and potentially increasing resale value.

Choosing the Right Satin Vinyl Wrap

When selecting the perfect satin vinyl wrap for your vehicle, consider the following factors:

1. Color Selection

Consider the overall aesthetic you want to achieve. Do you want a bold statement color, or something more subtle? Look for colors that complement your vehicle’s design.

2. Quality of Material

Not all vinyl wraps are created equal. Choose high-quality wraps from reputable brands to ensure durability and longevity. Look for wraps that offer warranties as an assurance of their quality.

3. Thickness and Stretchability

Thicker vinyl tends to be more durable, while stretchable vinyl can conform better to curves and contours. Ensure the vinyl you choose matches the complexity of your vehicle’s design.

4. Finish Options

While satin is a popular choice, you might also explore other finishes. Ensure that the satin finish aligns with your style preferences and the look you want to achieve.

5. Professional Installation

For the best results, consider hiring a professional for the installation. A poorly applied wrap can lead to bubbles, peeling, and an overall unappealing appearance. Professionals have the experience and tools necessary to ensure a flawless finish.

Maintenance Tips for Satin Vinyl Wraps

To keep your satin vinyl wrap looking pristine, follow these maintenance tips:

  • Hand Wash: Always hand wash your vehicle using a gentle soap and soft sponge. Avoid automatic car washes with brushes that can damage the wrap.
  • Avoid Harsh Chemicals: Steer clear of abrasive cleaners and solvents that can degrade the vinyl.
  • Drying: Use a microfiber towel to dry your vehicle to prevent water spots.

Conclusion

Satin vinyl wraps offer a fantastic way to elevate your vehicle’s style while providing essential protection for your car’s paint. The aesthetic appeal combined with the durability of vinyl wraps makes them a popular choice among car enthusiasts and everyday drivers alike. By choosing the right materials and following proper maintenance techniques, you can ensure that your vehicle remains a head-turner for years to come. So why wait? Consider a satin vinyl wrap for your vehicle today!

Revamp Your Ride: The Ultimate Guide to SUV Car Wraps

automobile, suv, vehicle, small car, passenger cars, red, nature, suv, suv, suv, suv, suv

Revamp Your Ride: The Ultimate Guide to SUV Car Wraps

In today’s automotive world, standing out on the road is more important than ever. One of the most effective ways to elevate your vehicle’s style and personality is through an SUV car wrap. This guide explores the transformative power of car wraps, detailing their benefits, design options, and how they can help maintain your vehicle’s value.

What is an SUV Car Wrap?

An SUV car wrap is a large vinyl graphic or decal that covers the exterior of your vehicle. These wraps can be full or partial, allowing for a wide range of customization options. Whether you’re looking to make a statement or protect your vehicle’s original paint, an SUV car wrap offers versatility and style.

Benefits of SUV Car Wraps

  • Customization: One of the biggest advantages of an SUV car wrap is the ability to personalize your vehicle. From bold colors to intricate designs, you can express your unique style.
  • Protection: A high-quality wrap acts as a protective layer against scratches, UV rays, and other environmental factors, preserving your vehicle’s original paint.
  • Cost-Effective: Compared to a full paint job, a car wrap is often more affordable and can be removed or changed easily.
  • Resale Value: Maintaining the original paint of your SUV can help preserve its resale value. Once you remove the wrap, the paint underneath is likely to be in excellent condition.
  • Easy Maintenance: Car wraps are easy to clean and maintain, requiring just a simple wash to keep them looking fresh.

Types of SUV Car Wraps

There are several types of SUV car wraps available, each offering different aesthetics and benefits:

  • Gloss Wraps: These provide a shiny, reflective finish that enhances the color and depth of your SUV.
  • Matte Wraps: If you’re looking for a more understated, modern look, matte wraps offer a smooth, non-reflective finish.
  • Textured Wraps: Unique textures, such as carbon fiber or brushed metal, can add a distinctive touch to your SUV.
  • Printable Wraps: For those wanting a completely unique design, printable wraps can be custom-designed with graphics, logos, or photos.

Choosing the Right Design for Your SUV Car Wrap

When selecting a design for your SUV car wrap, consider the following:

  • Brand Identity: If you’re a business, ensure your wrap aligns with your brand colors and logo for effective marketing.
  • Personal Style: Think about what represents you. Do you prefer vibrant colors, subtle tones, or bold patterns?
  • Local Regulations: Be aware of any local laws regarding vehicle wraps, especially those used for advertising.
  • Future Resale: Opt for designs that appeal to a broader audience if you plan to sell your SUV in the future.

Installation Process

Installing an SUV car wrap should be done by professionals to ensure the best results. Here’s a brief overview of the installation process:

  1. Preparation: The vehicle is thoroughly cleaned to remove dirt, wax, and grease.
  2. Measurement: Professionals will measure the vehicle to ensure the wrap fits perfectly.
  3. Application: The wrap is carefully applied, making sure to eliminate air bubbles and ensure a smooth finish.
  4. Curing: After installation, the wrap needs time to adhere properly, usually a few hours to a day.

Maintaining Your SUV Car Wrap

To keep your wrap looking its best, follow these maintenance tips:

  • Regular Washing: Hand wash your SUV regularly to remove dirt and grime.
  • Avoid Automatic Car Washes: The brushes can damage the wrap. Stick to gentle hand washing methods.
  • Inspect Regularly: Check for any lifting edges or damage and address it immediately to prevent further issues.
  • Park Wisely: Whenever possible, park in shaded areas or garages to minimize sun exposure.

Conclusion

Revamping your ride with an SUV car wrap is an excellent investment that can enhance your vehicle’s appearance while offering protection and maintaining its value. With various design options and benefits, there’s no better way to express your personal style on the road. Whether you’re looking to make a bold statement or simply protect your vehicle, a car wrap can transform your SUV into a unique expression of you.